Hard Rock Forums

Register a free account today to become a member! Once signed in, you'll be able to participate on this site by adding your own topics and posts, as well as connect with other members through your own private inbox!

Speed King

Administrator
Staff member
Joined
Mar 27, 2018
Messages
2,130
Age
58
Location
Rockford, IL
#1
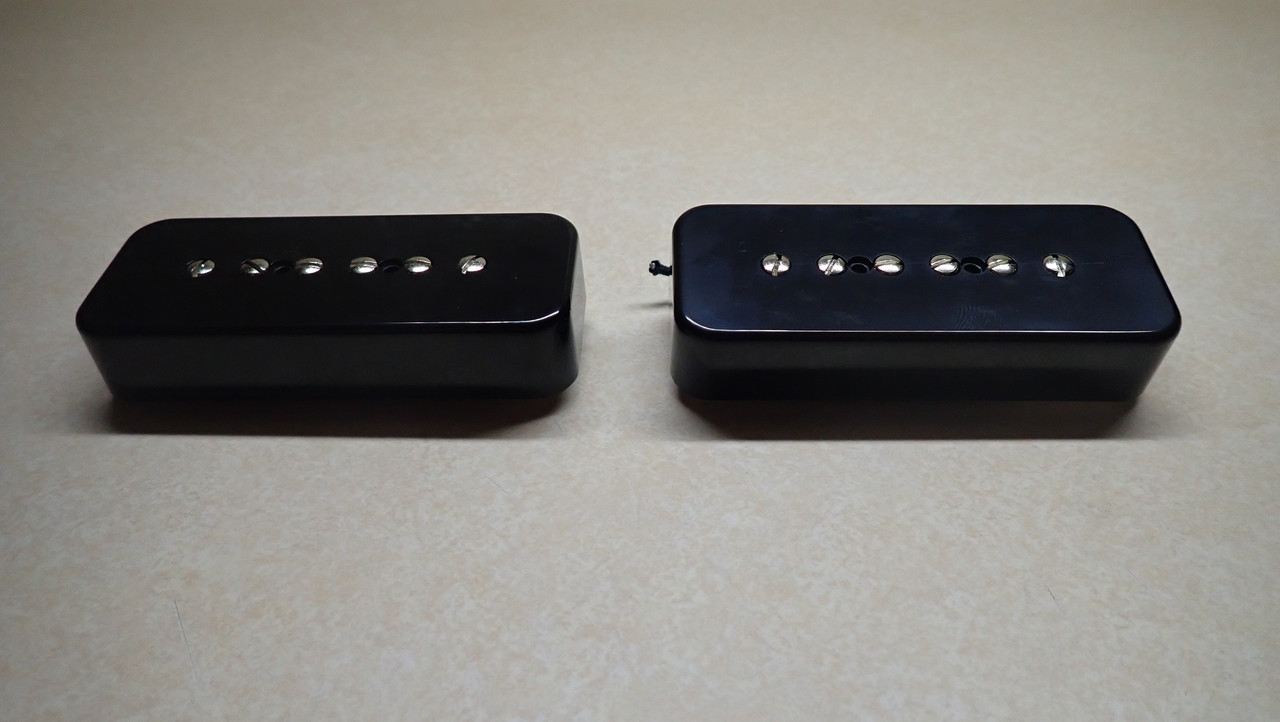
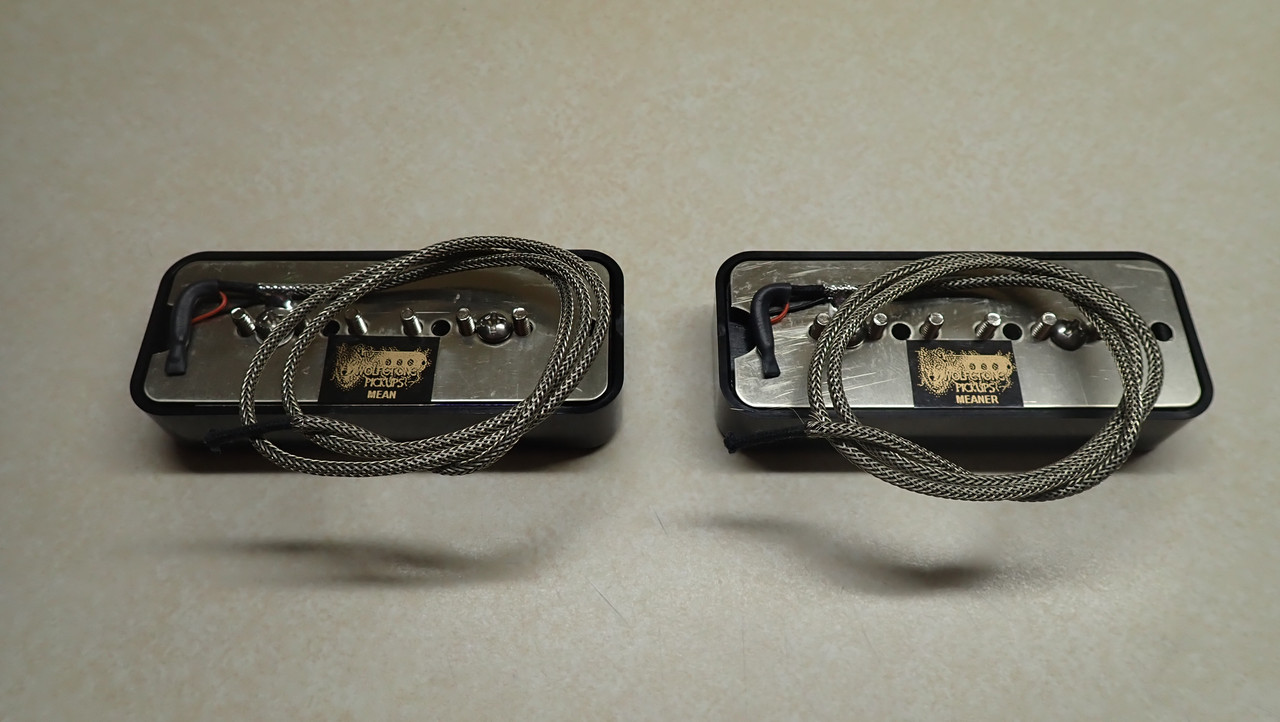
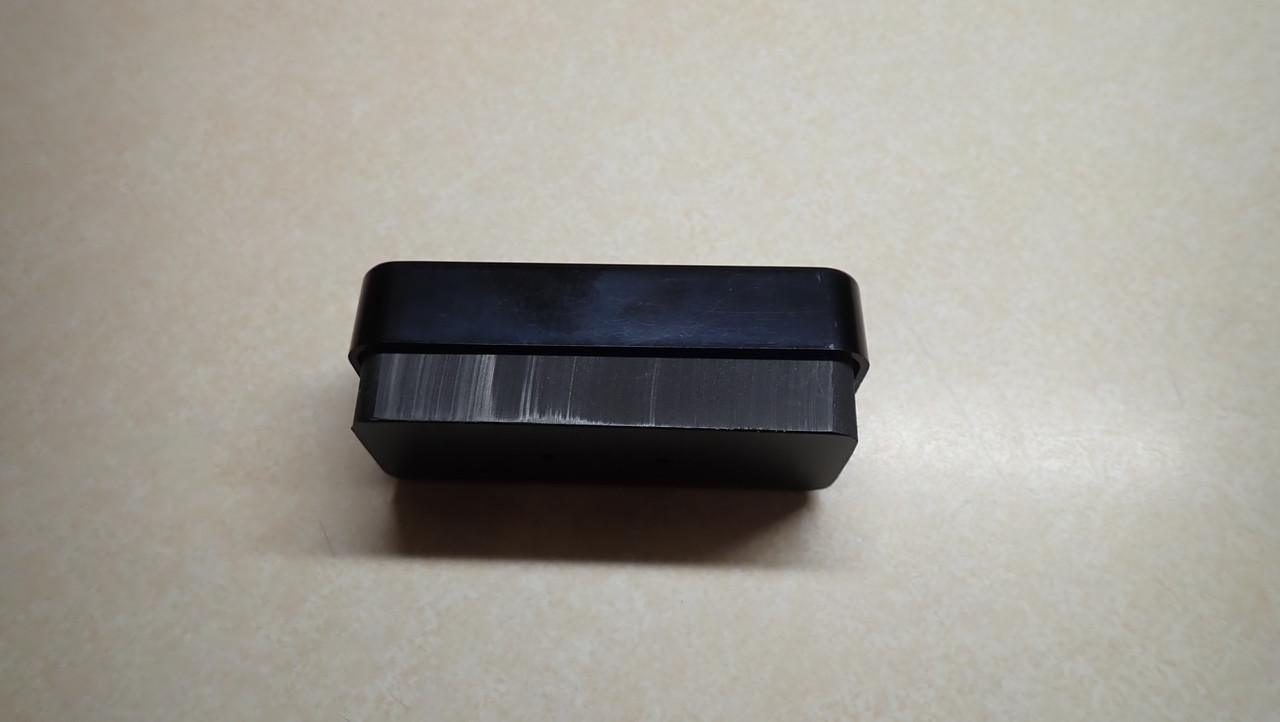
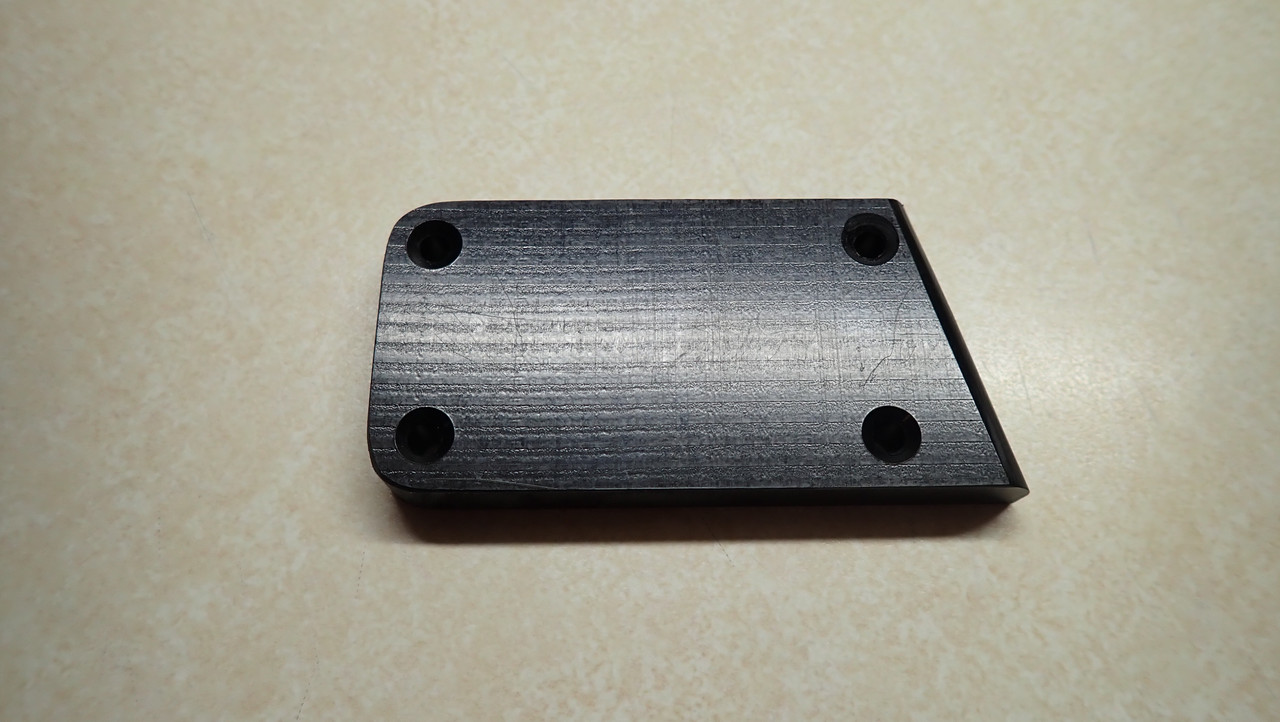
Ok, so I just ordered a set of P90s from Wolfetone for my 1986 Gibson SG Standard. (Mean/Meaner) I've been wanting a P90 guitar for as long as I can remember, I've been playing 41 years and have owned mostly Gibsons with humbuckers. This particular SG I found in a local music shop back in the early 1990s and it was so cheap I felt compelled to buy it even though I didn't really need another Gibson with buckers. It started out as a black guitar and looked really nice when I first bought it. After a while, the finish began to flake off, not just a little but in large shards. So being borderline obsessive/compulsive, I began helping the process along, mainly because I couldn't have this guitar exfoliating everywhere it goes. But there was a bigger problem than this black snake of a guitar shedding it's skin every where, the tone of this guitar was below mediocre. I understood why I got it so cheap, it needed a better set of pickups. So I set about finding a nice upgrade to the stock pickups an settled on a set of used Gibson 57 classics I found in a box on the counter of Dave's Guitars up in LaCrosse, Wi. Back then, Dave would sell pickups and parts that were taken out of customers guitars when they were brought in for mods. I got a killer price for them and totally expected these pickups to radically transform the tone my skin shedding SG. They only marginally improved the sound, and to say the least, I was pretty bummed out about the whole deal so I put the guitar away in a closet and didn't really think about for a couple decades.
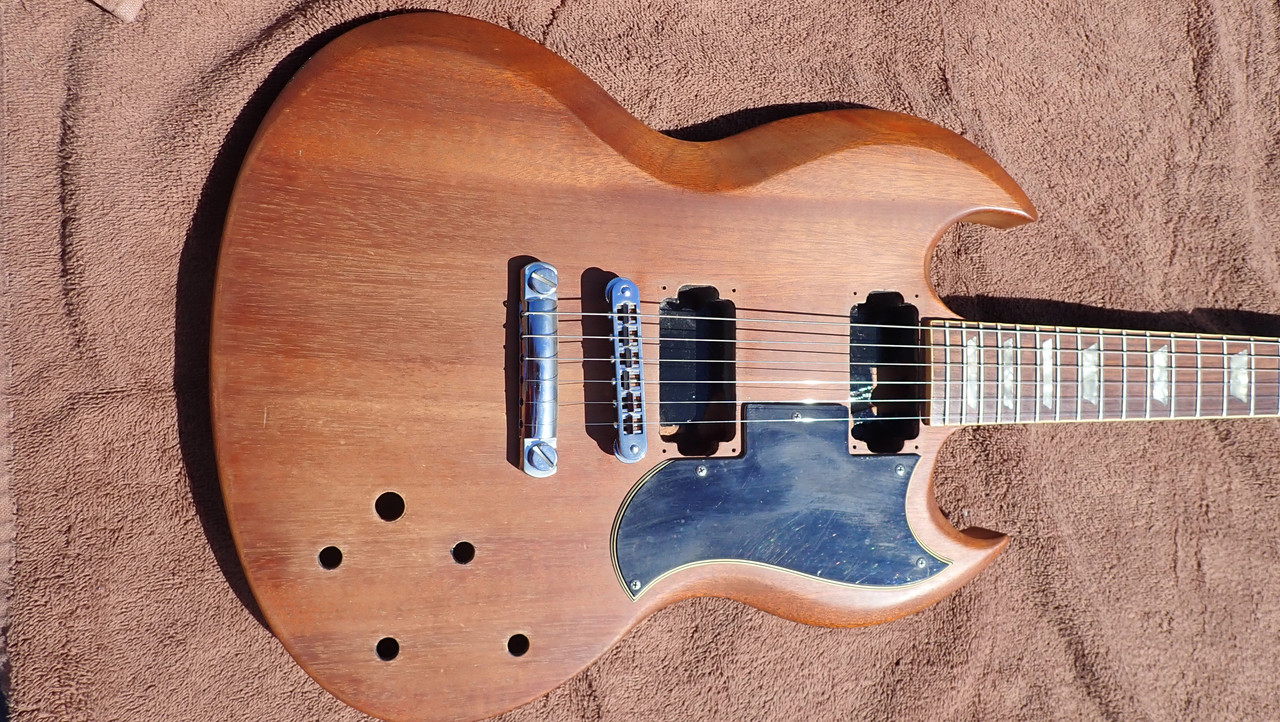
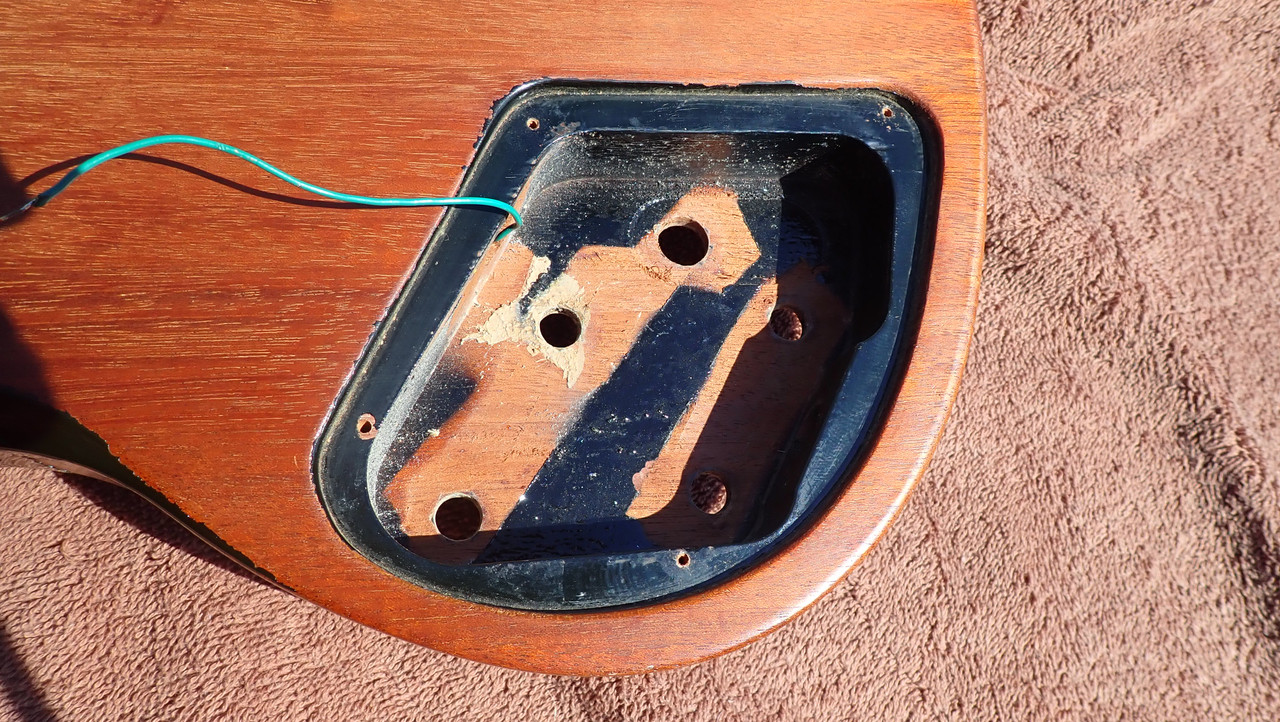
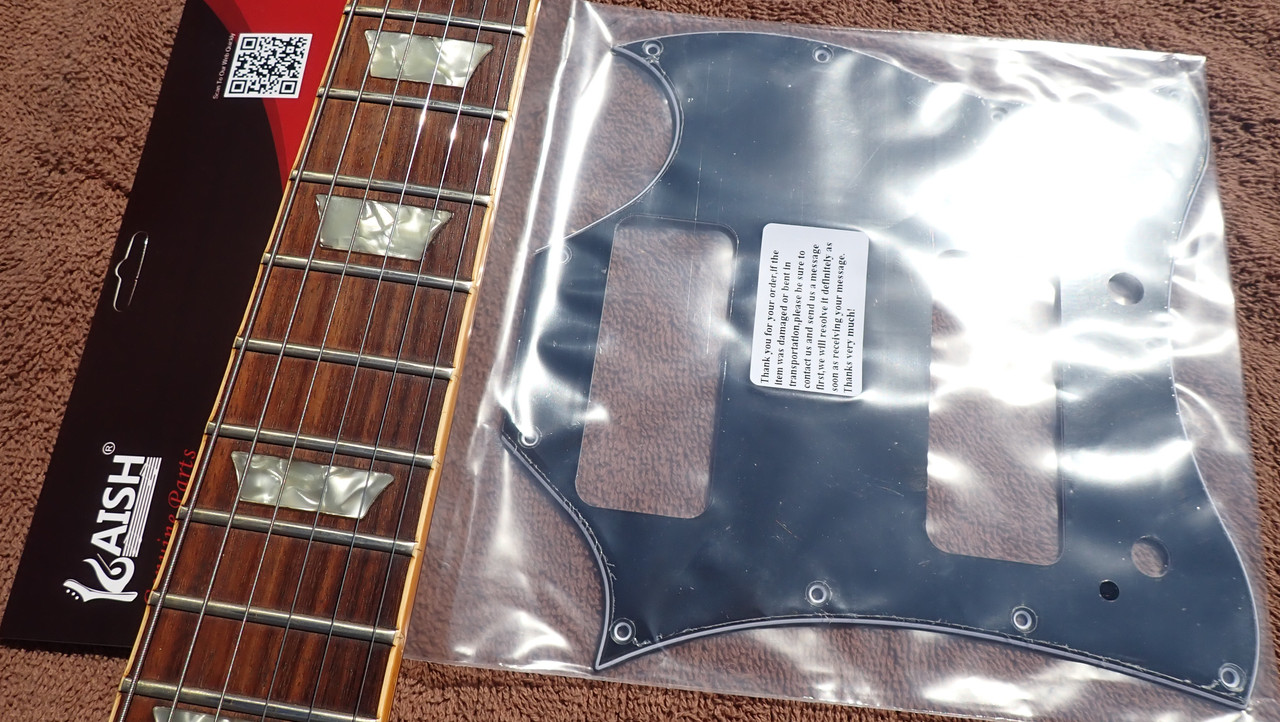
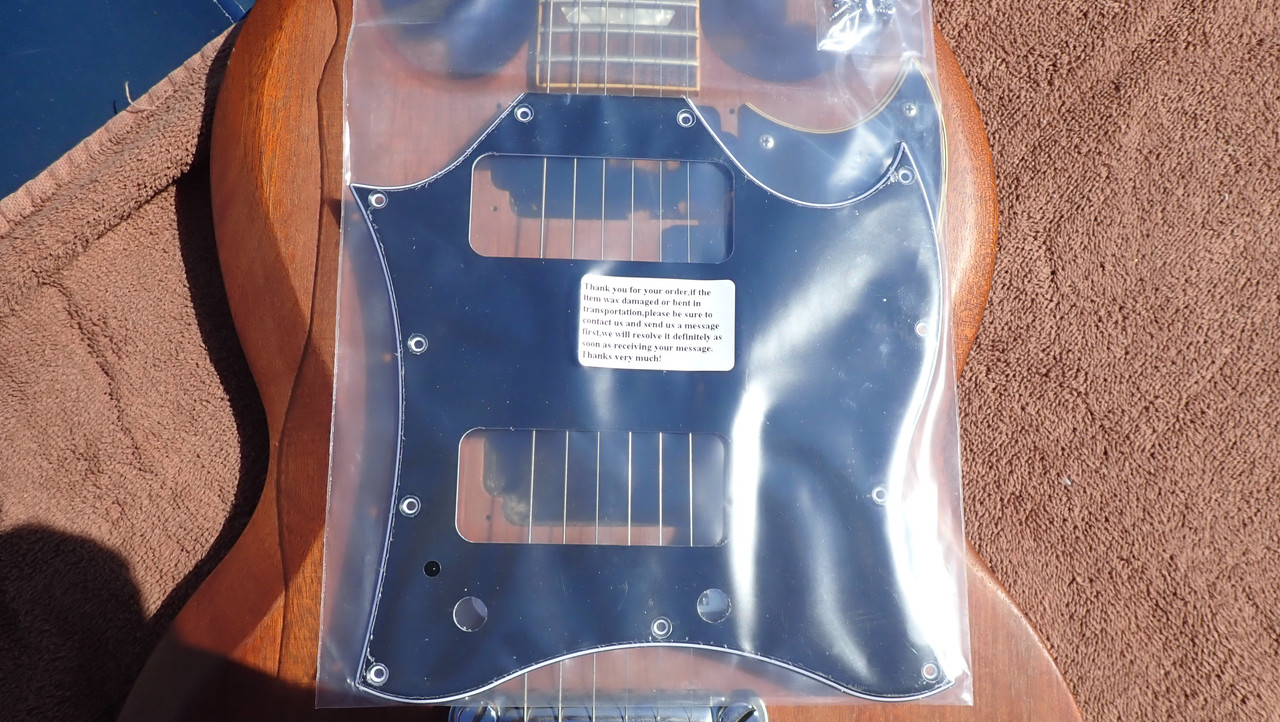
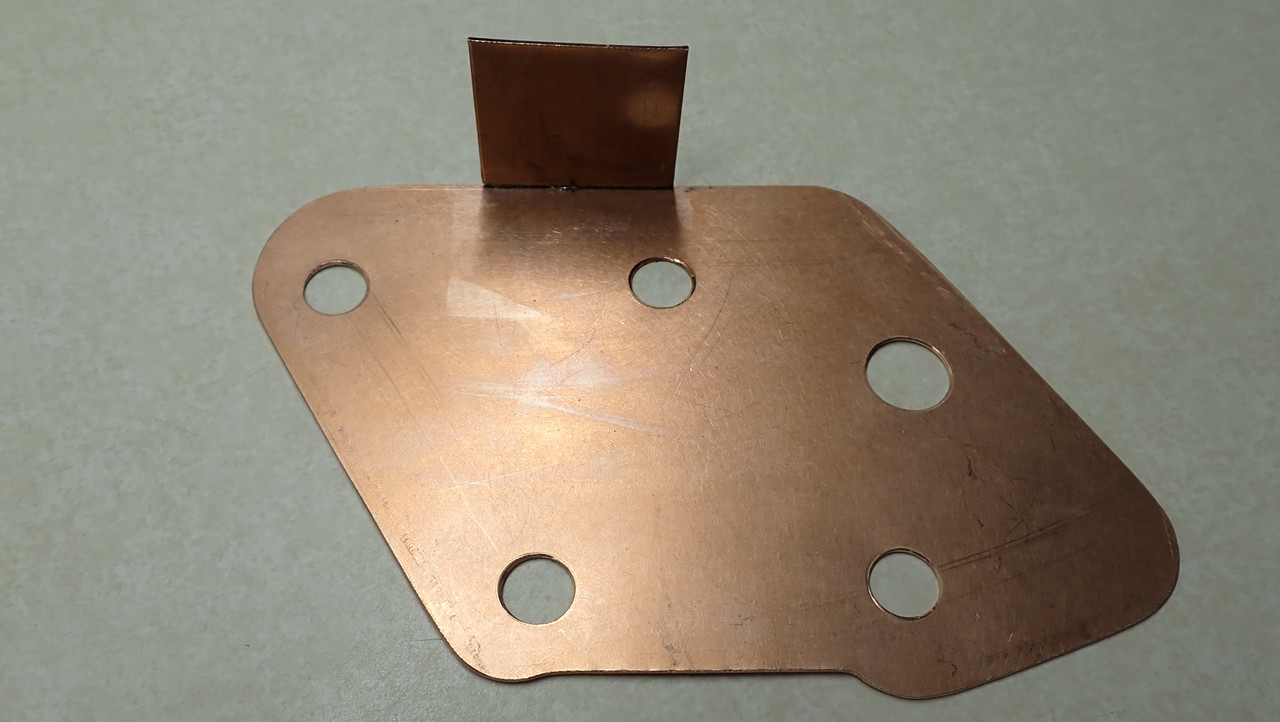
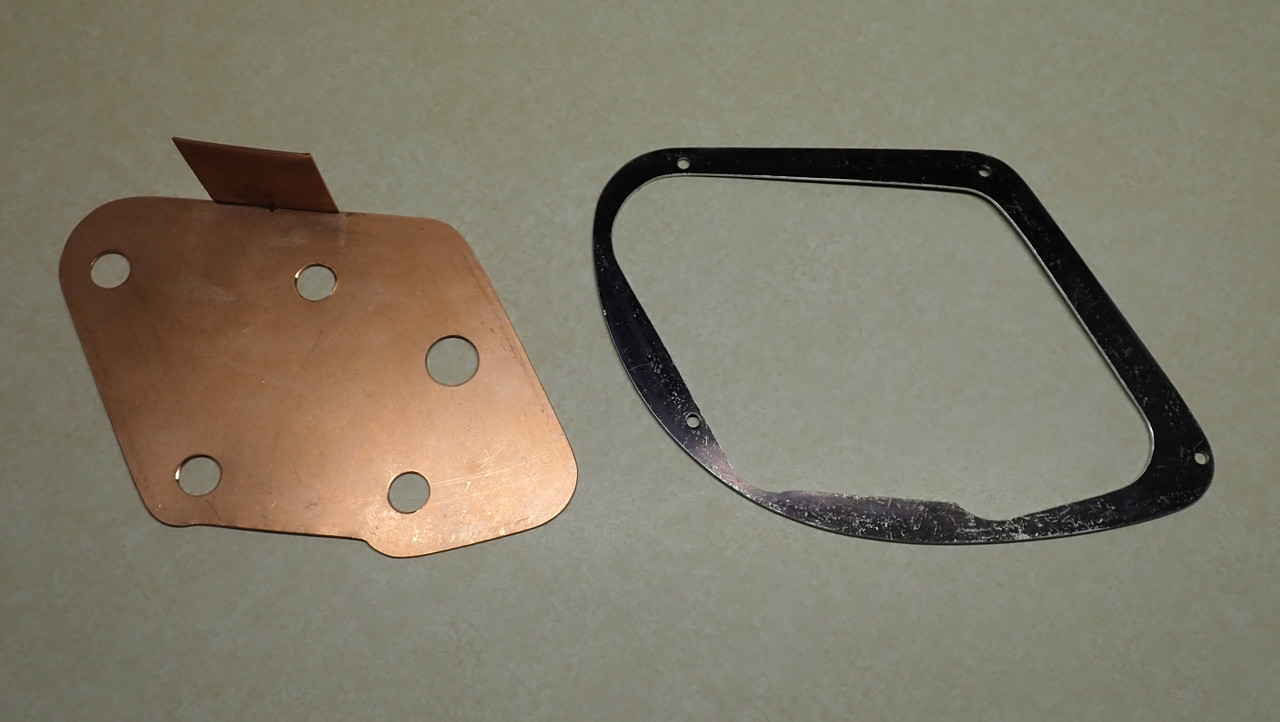
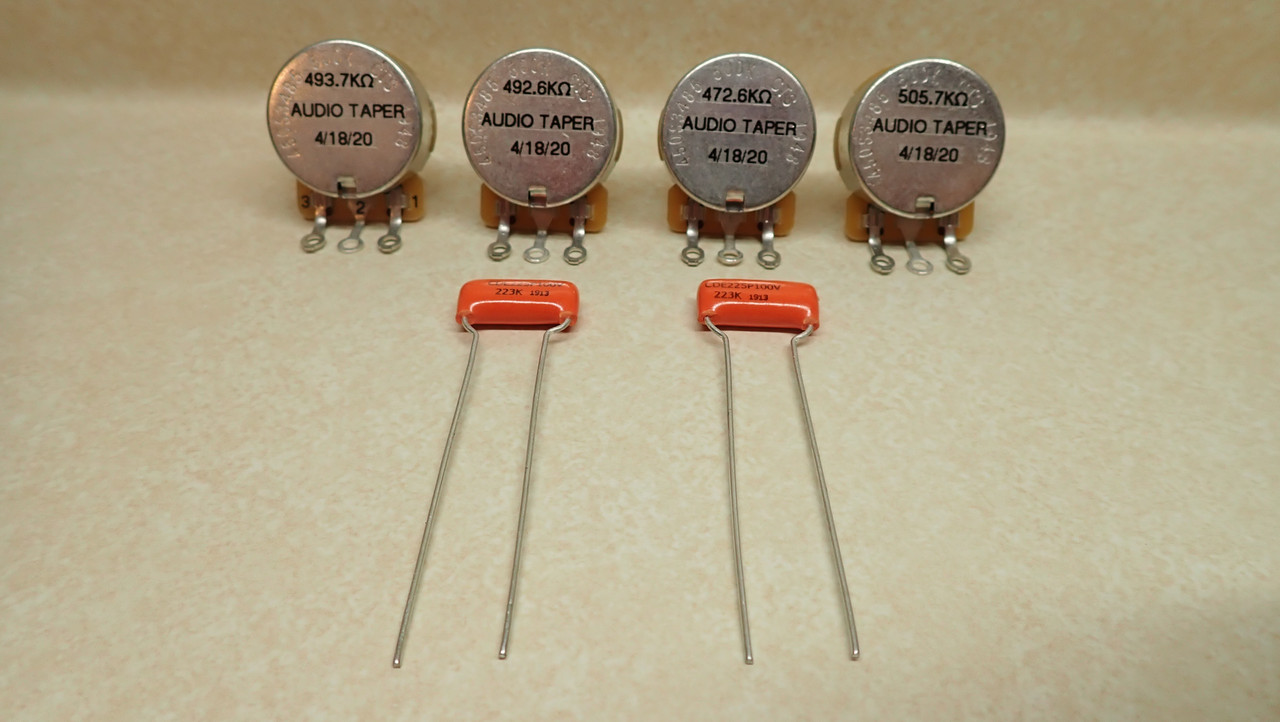
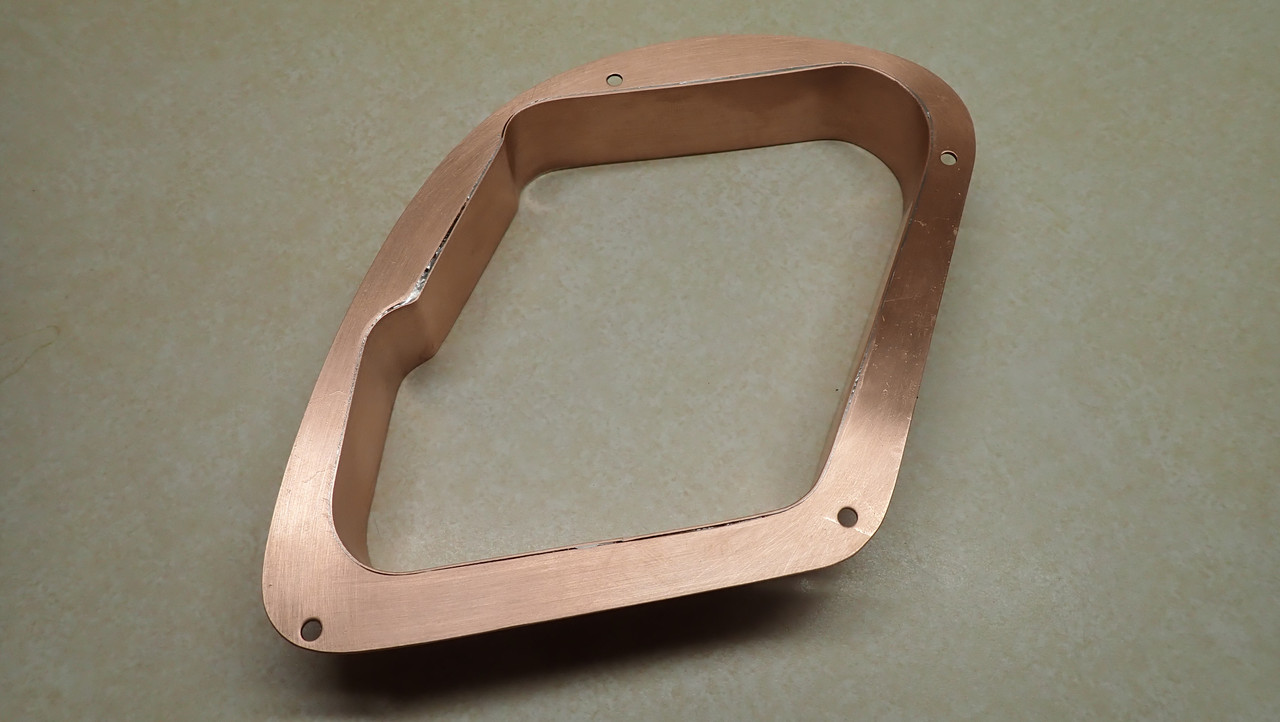
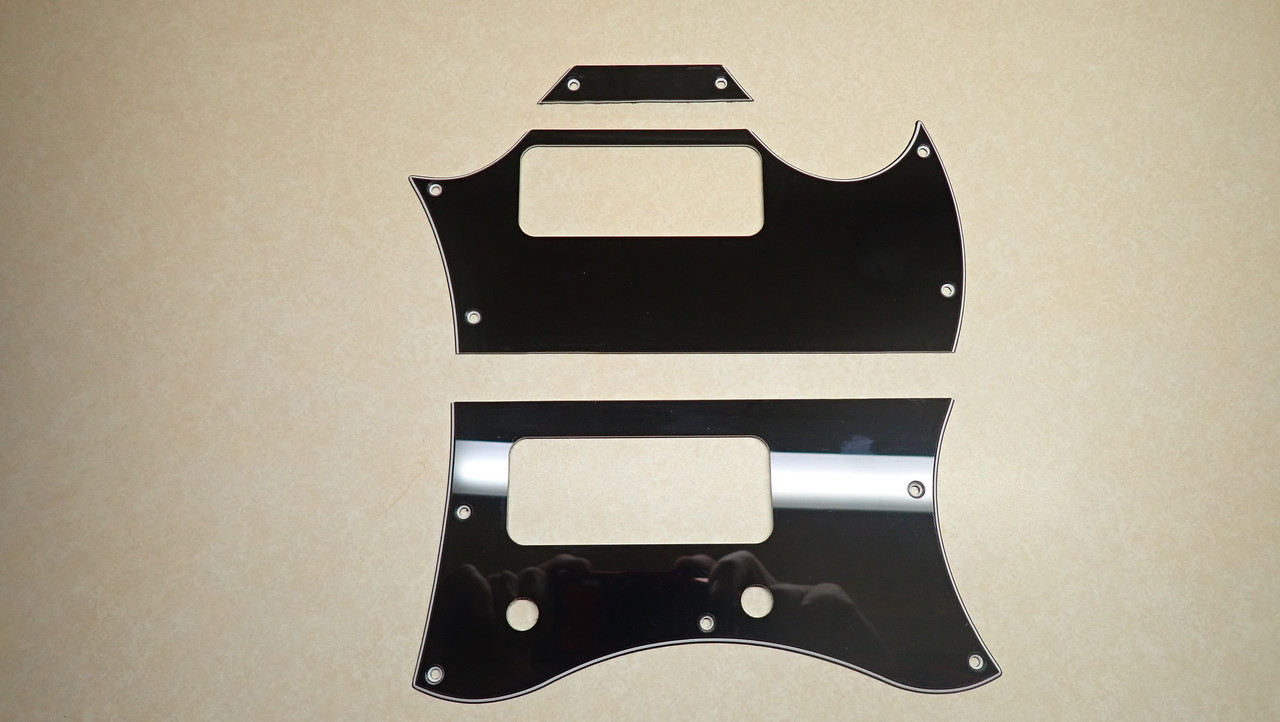
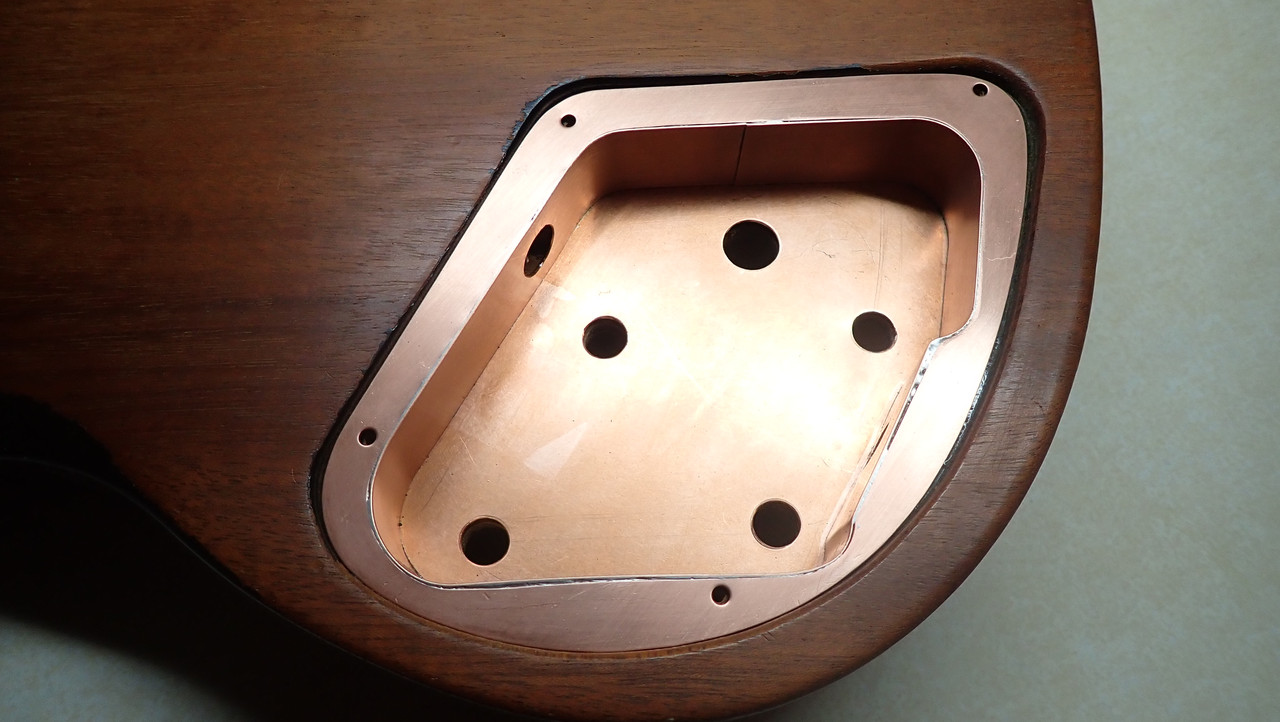
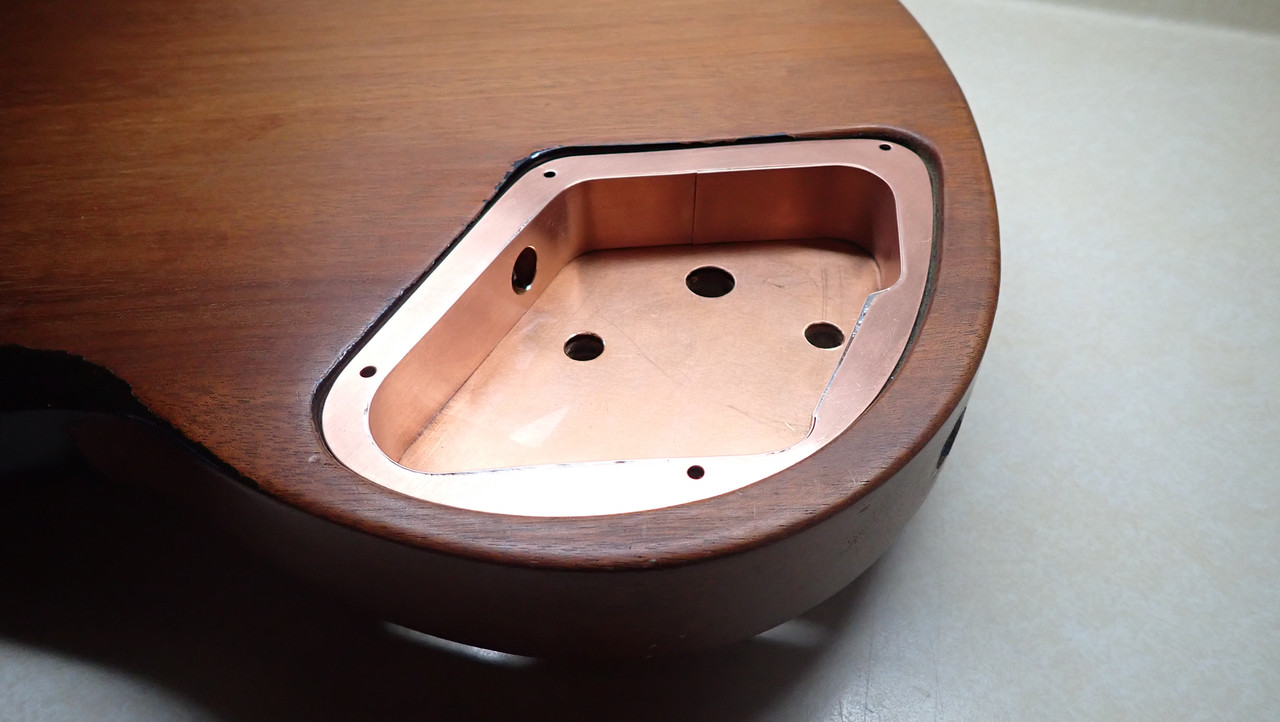
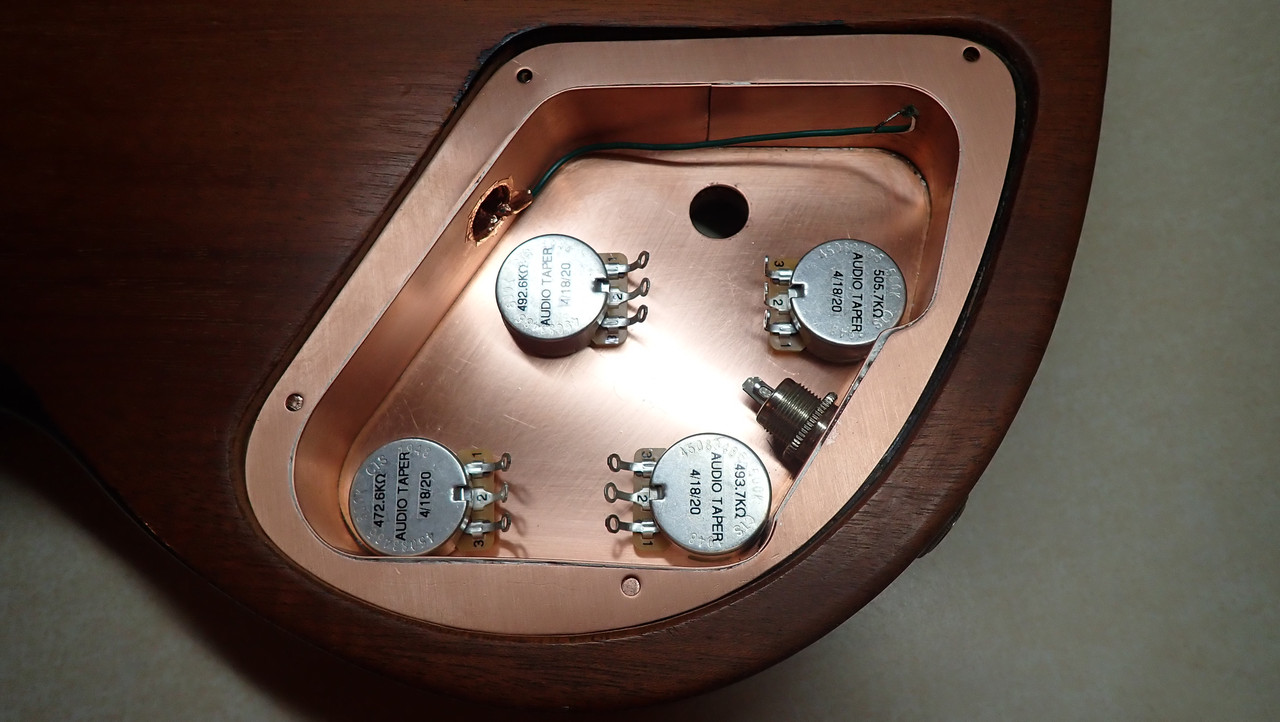
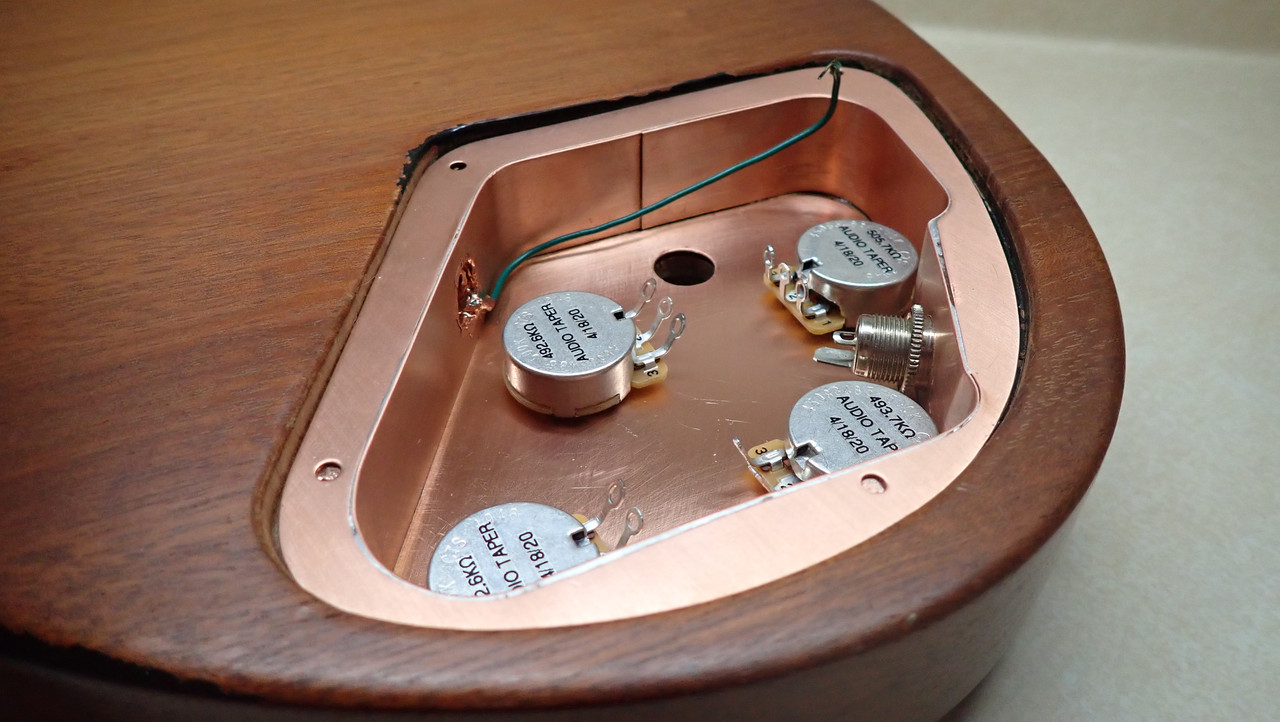
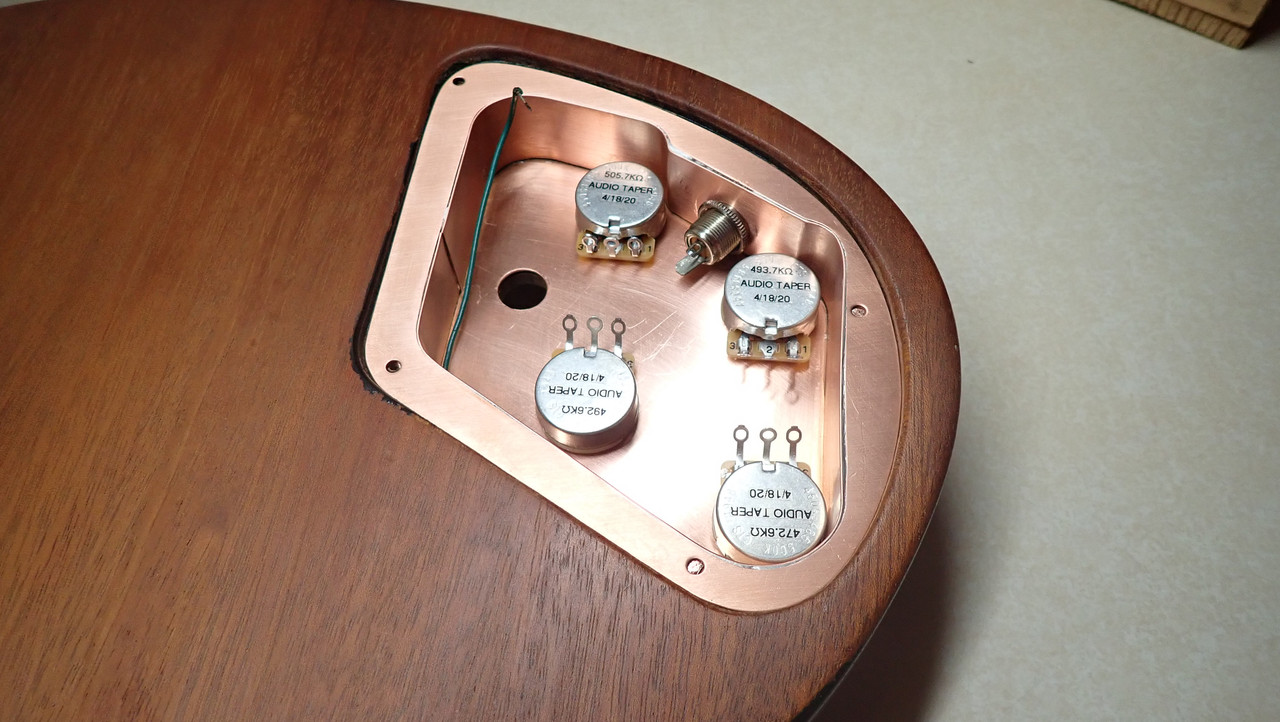
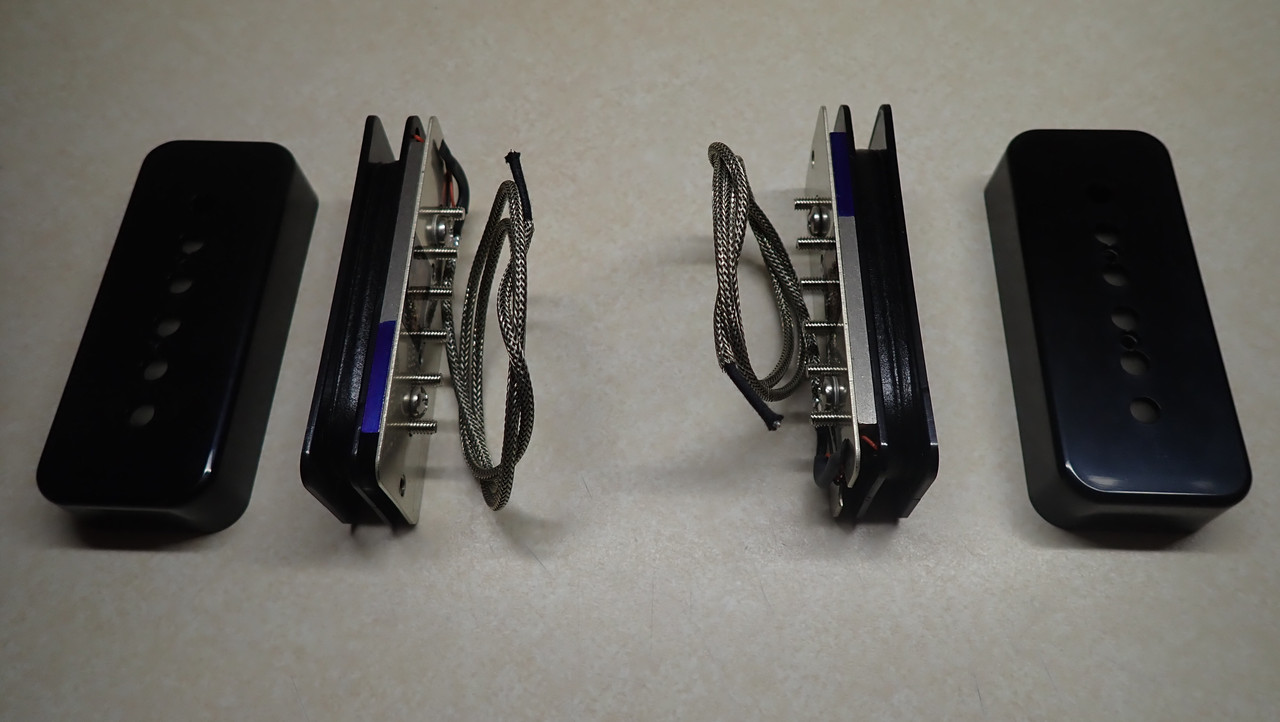
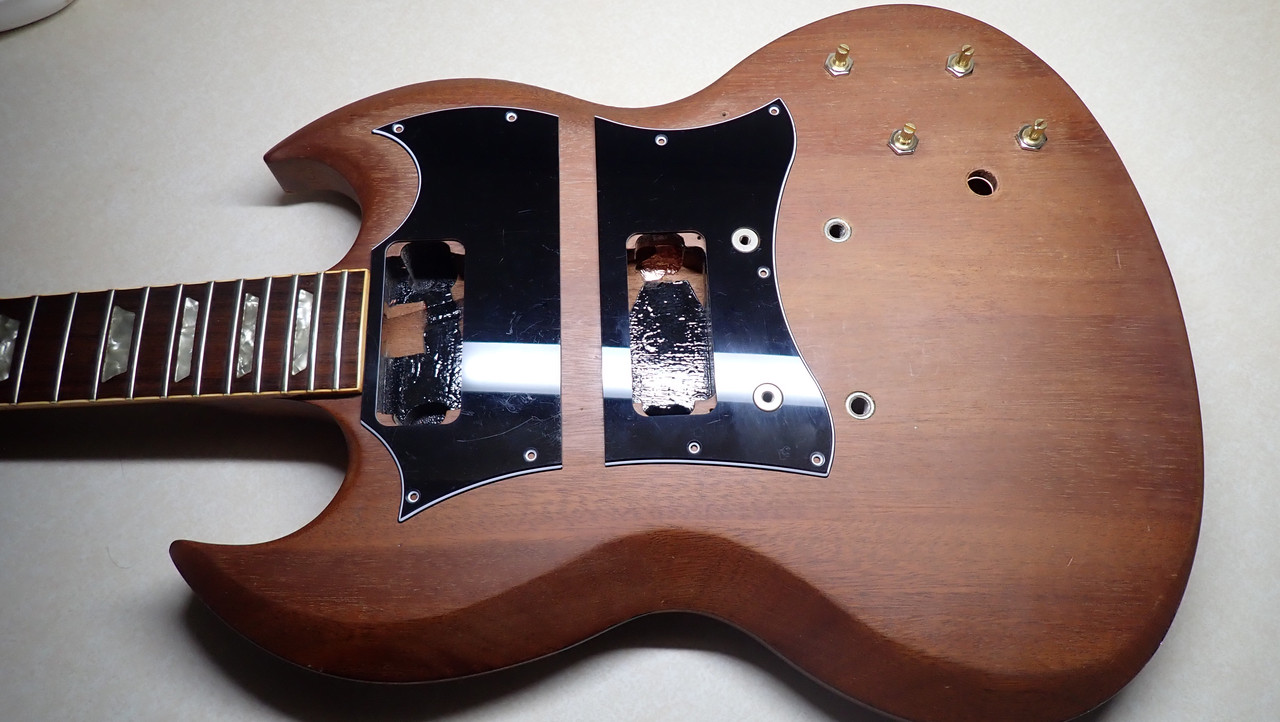
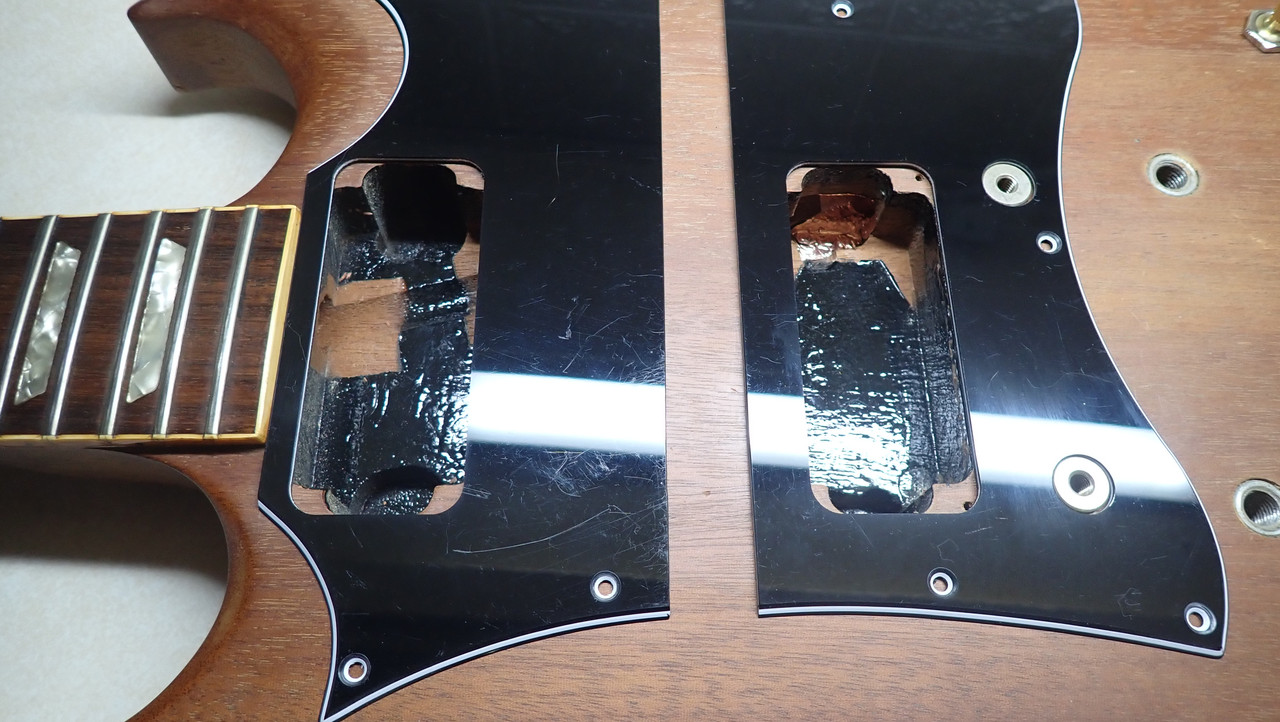
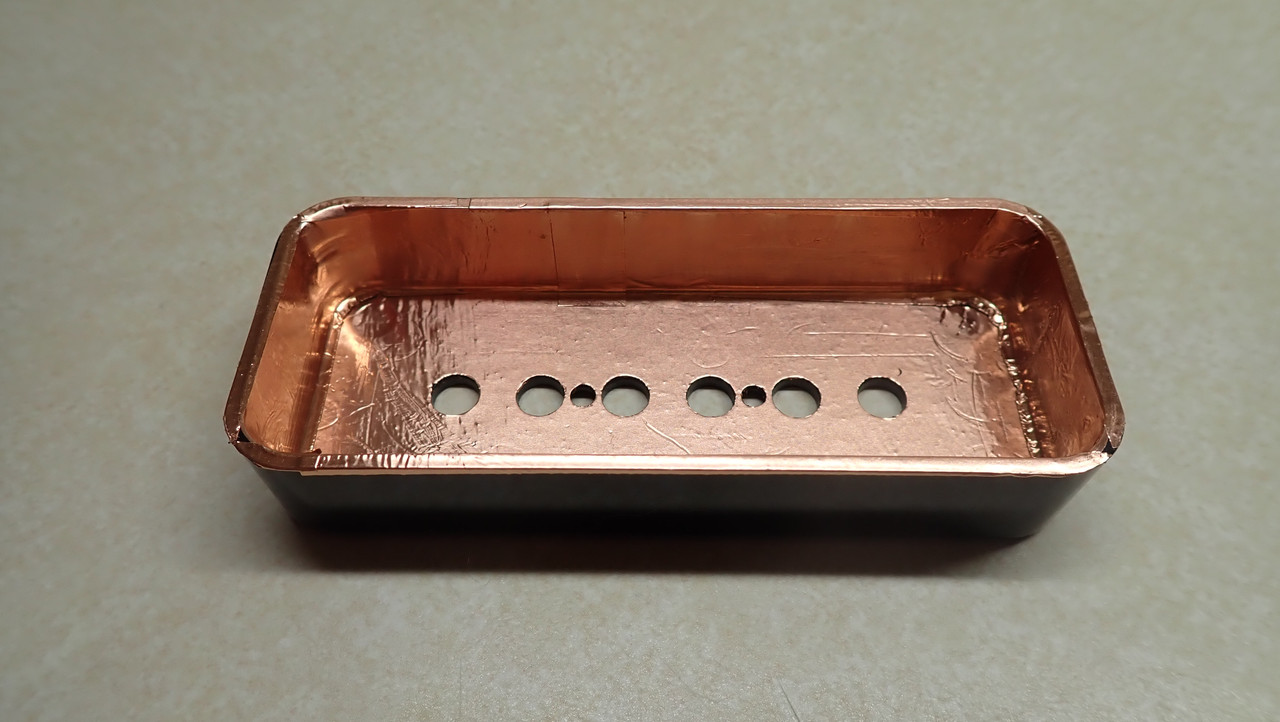
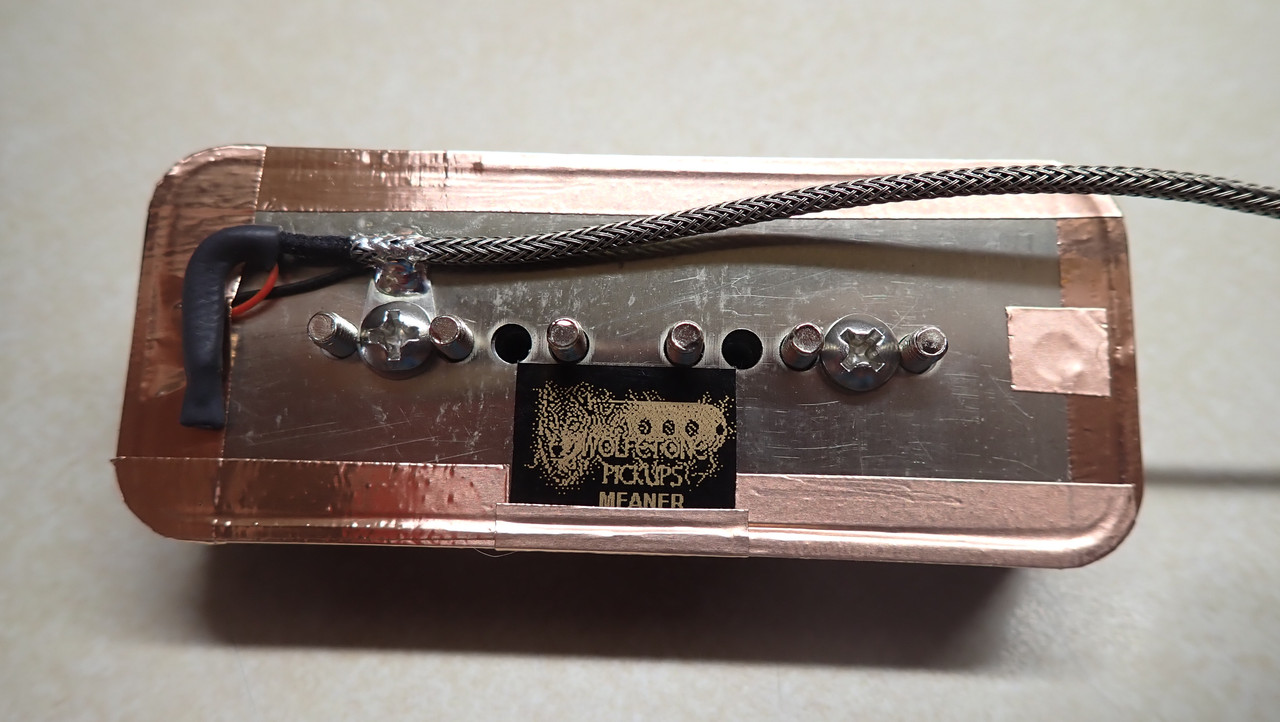
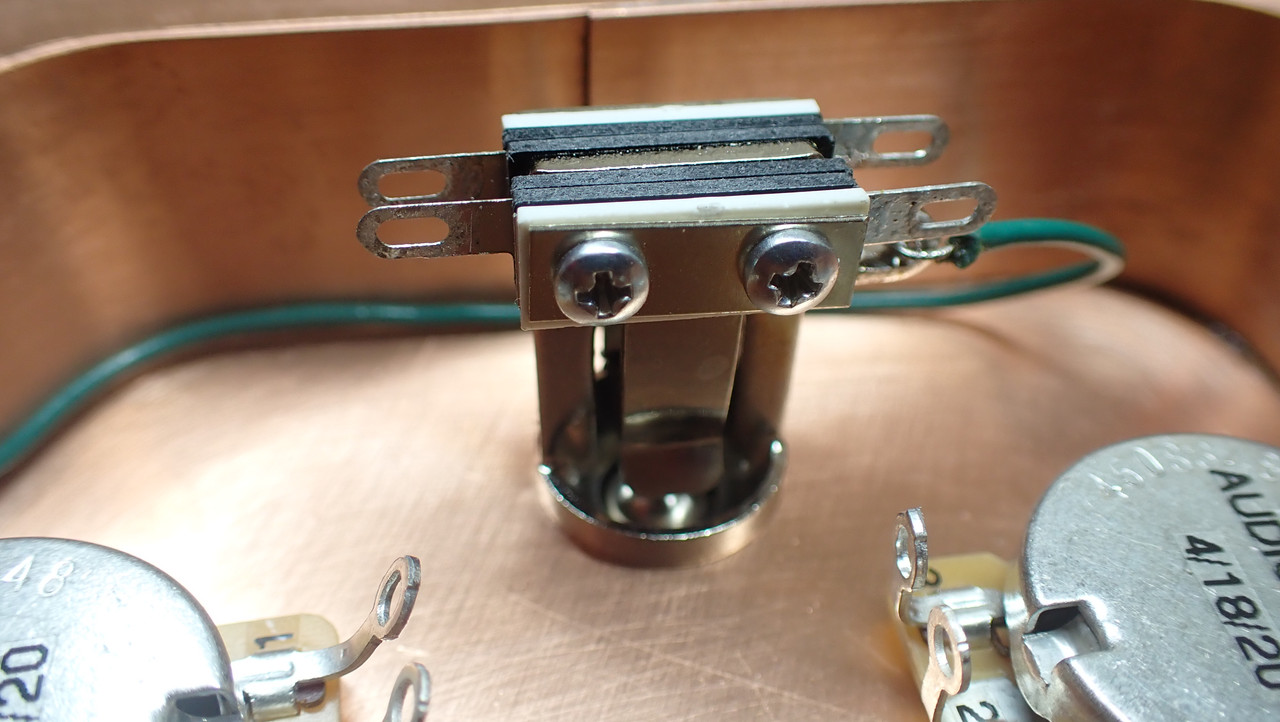
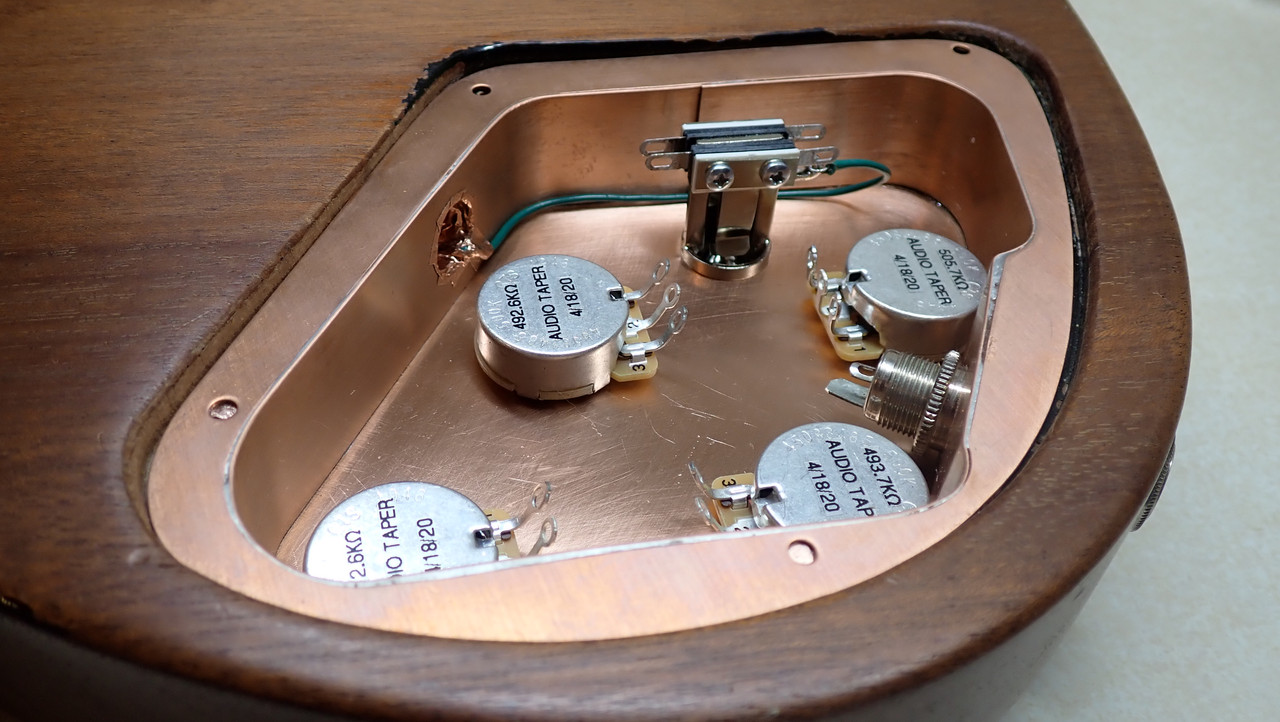
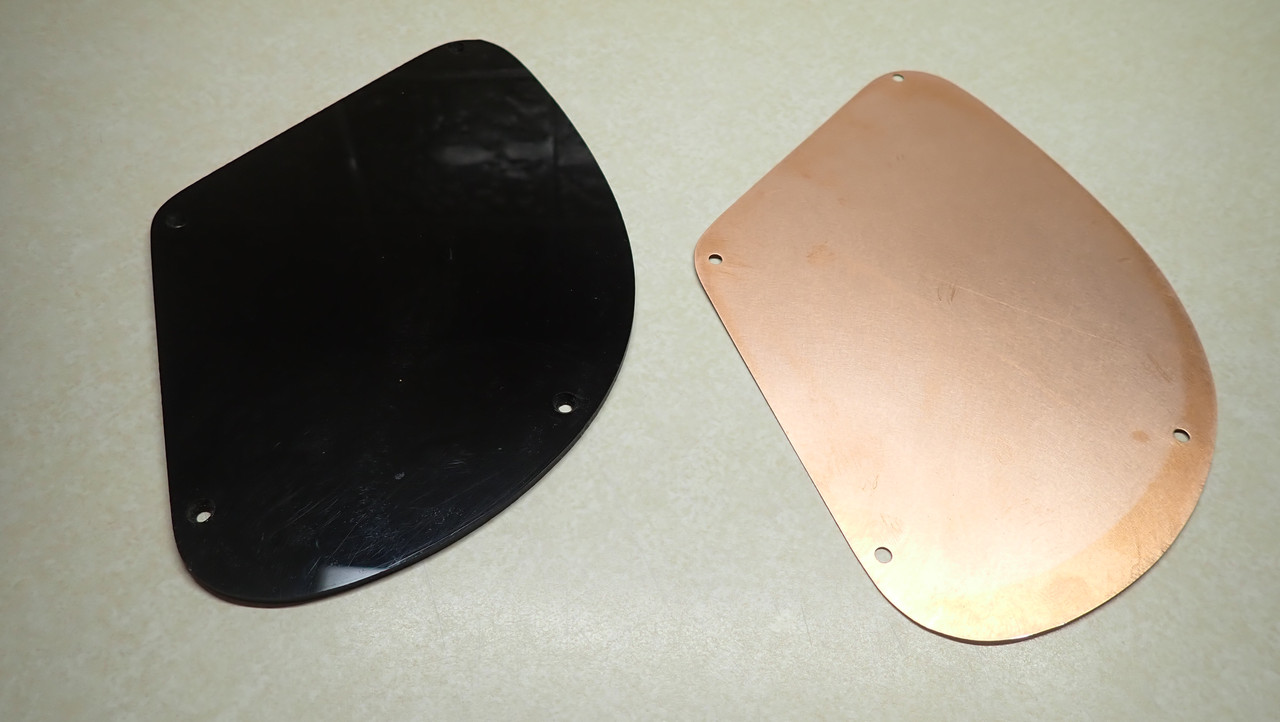
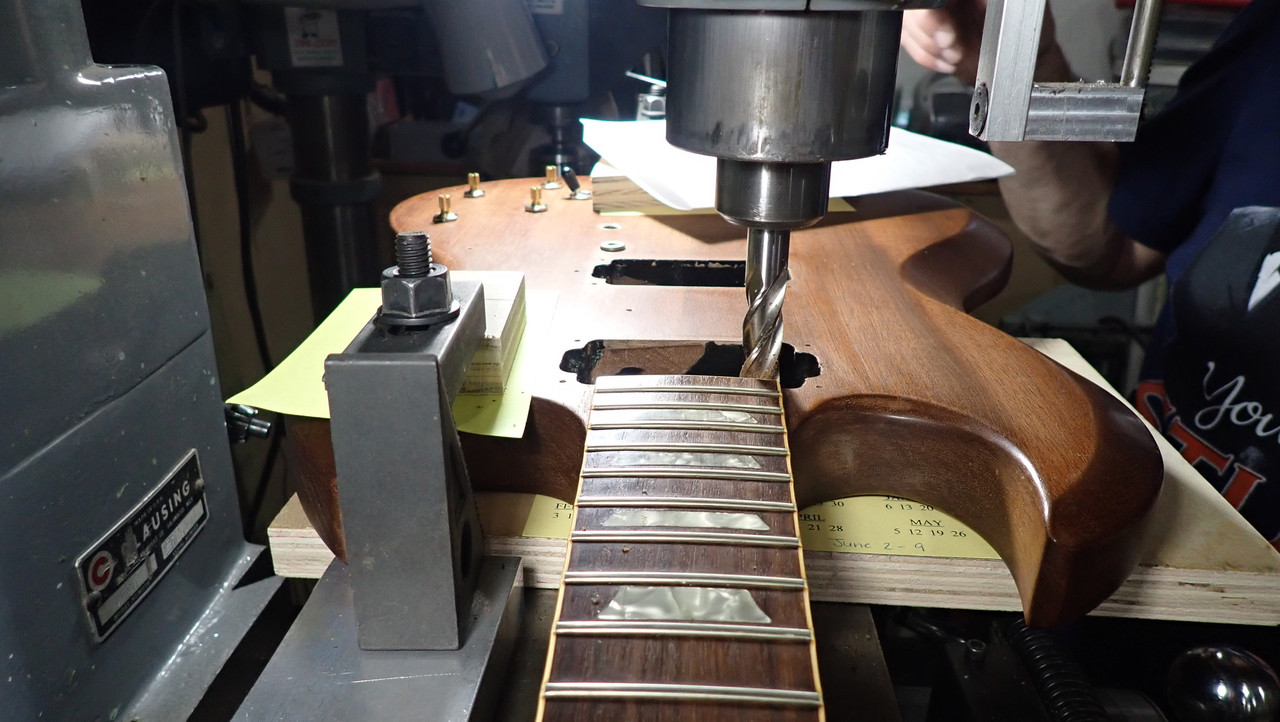
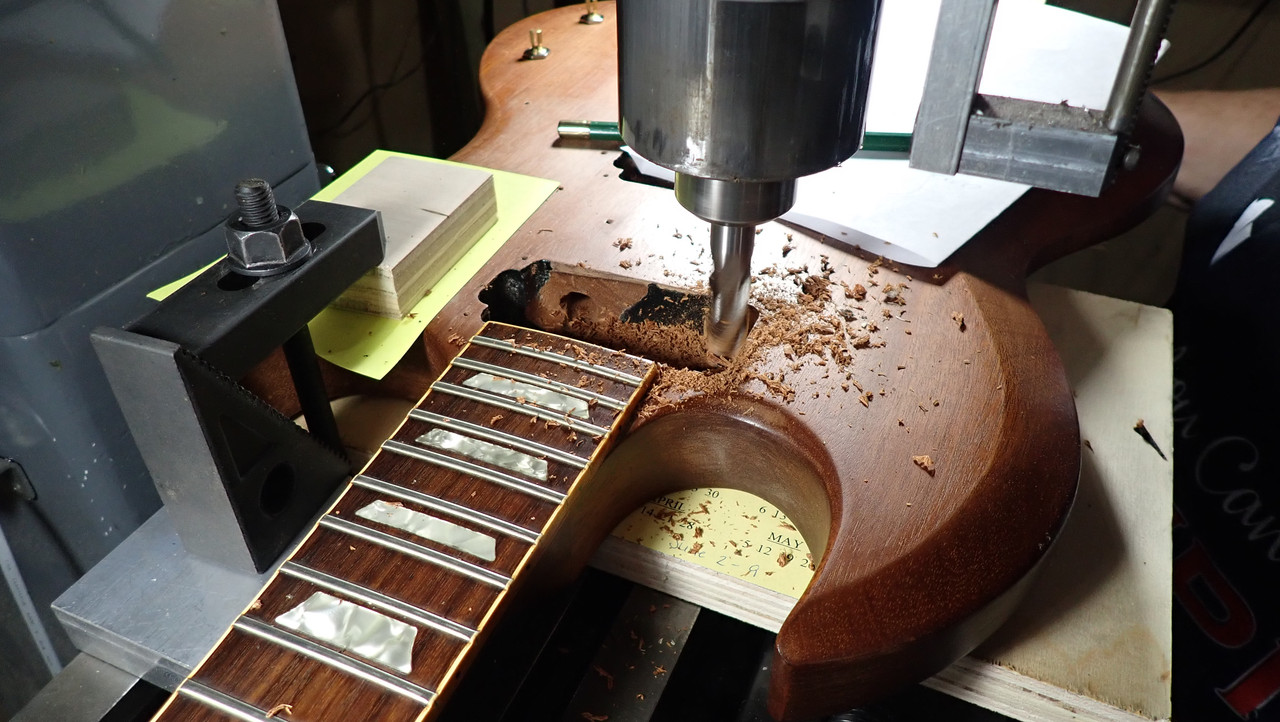
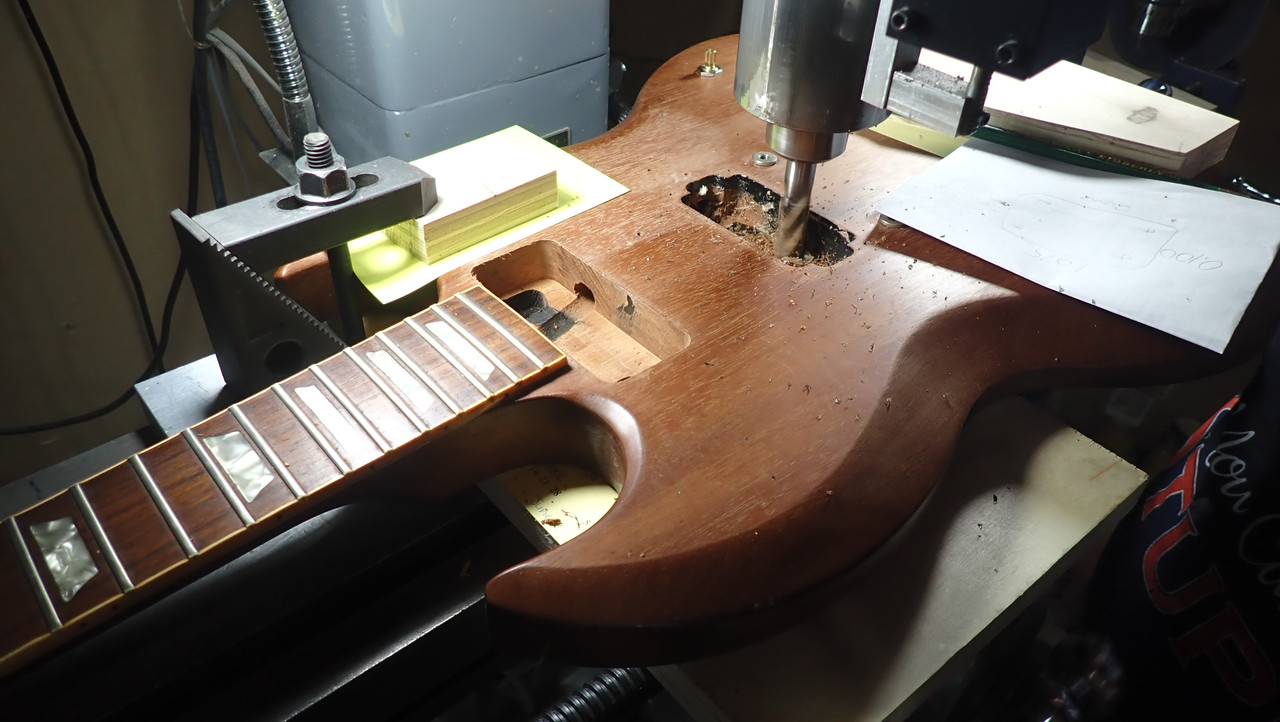
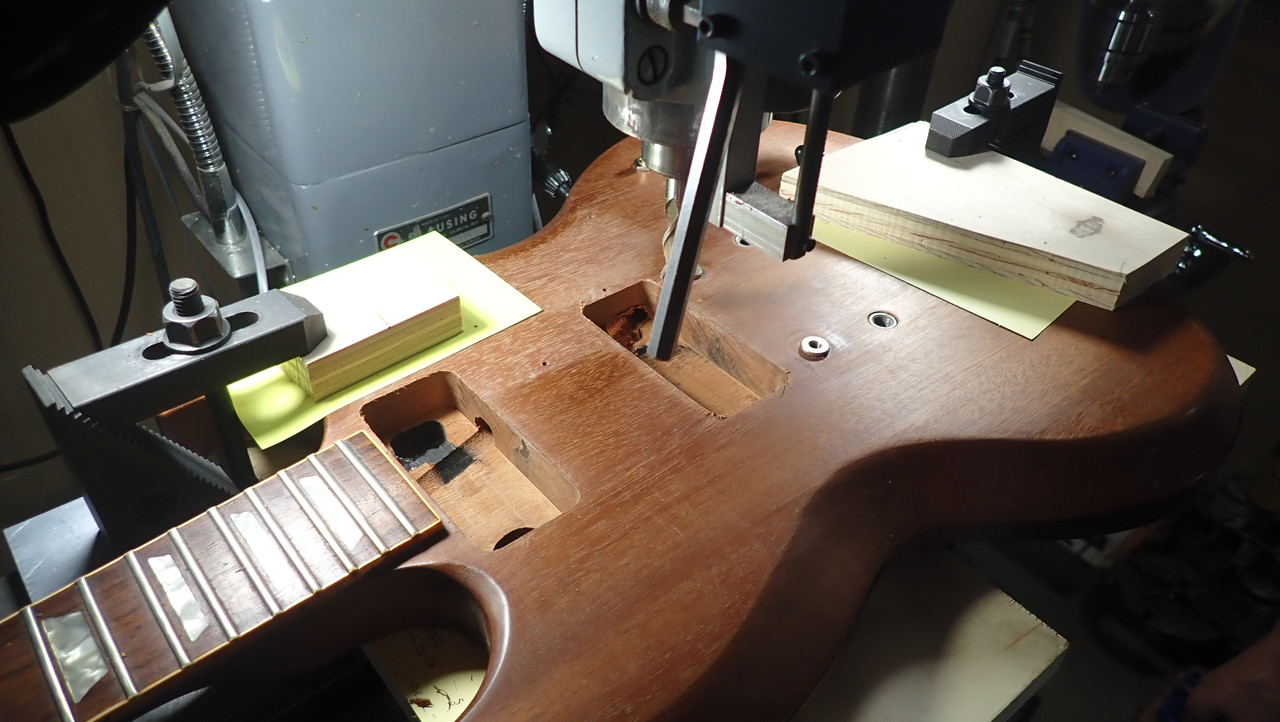
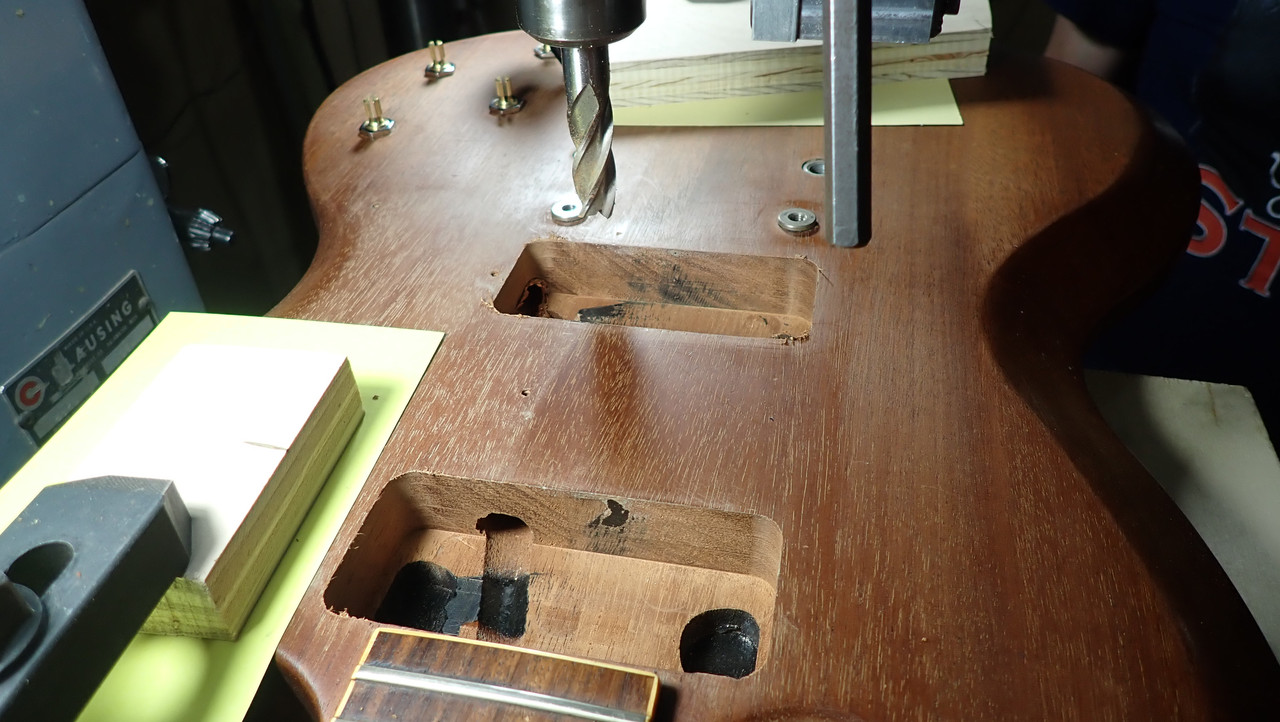
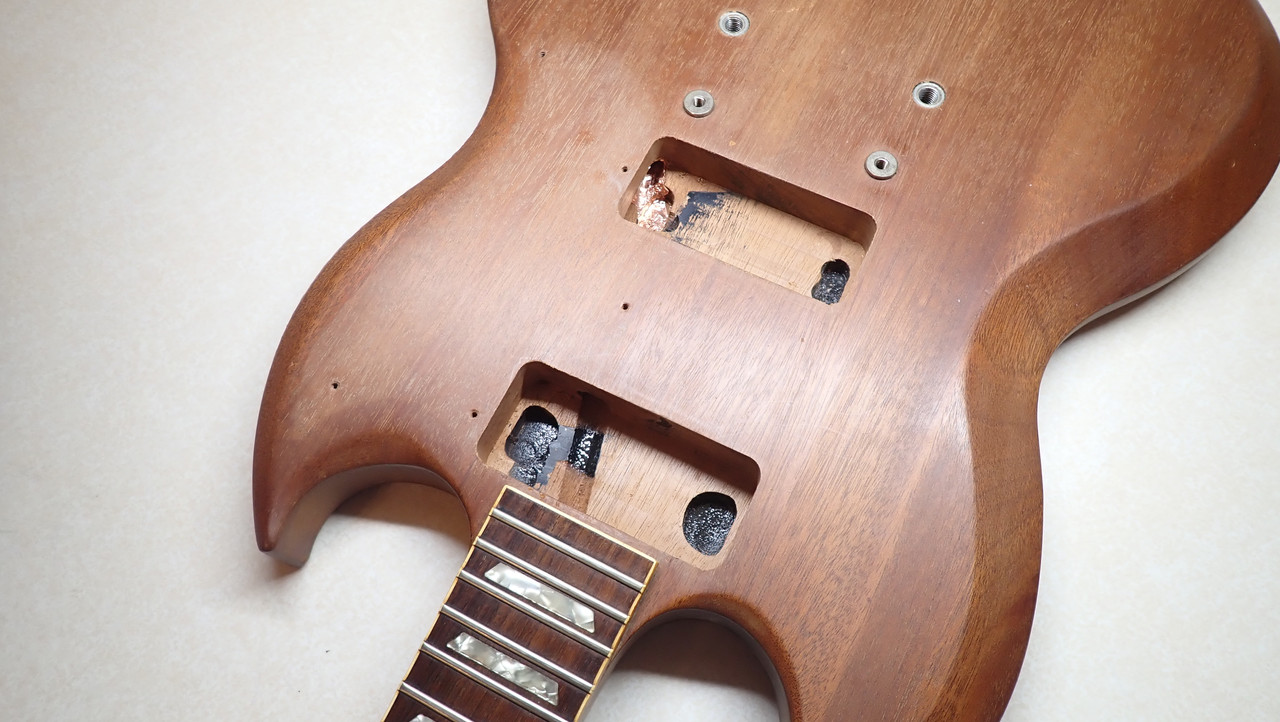
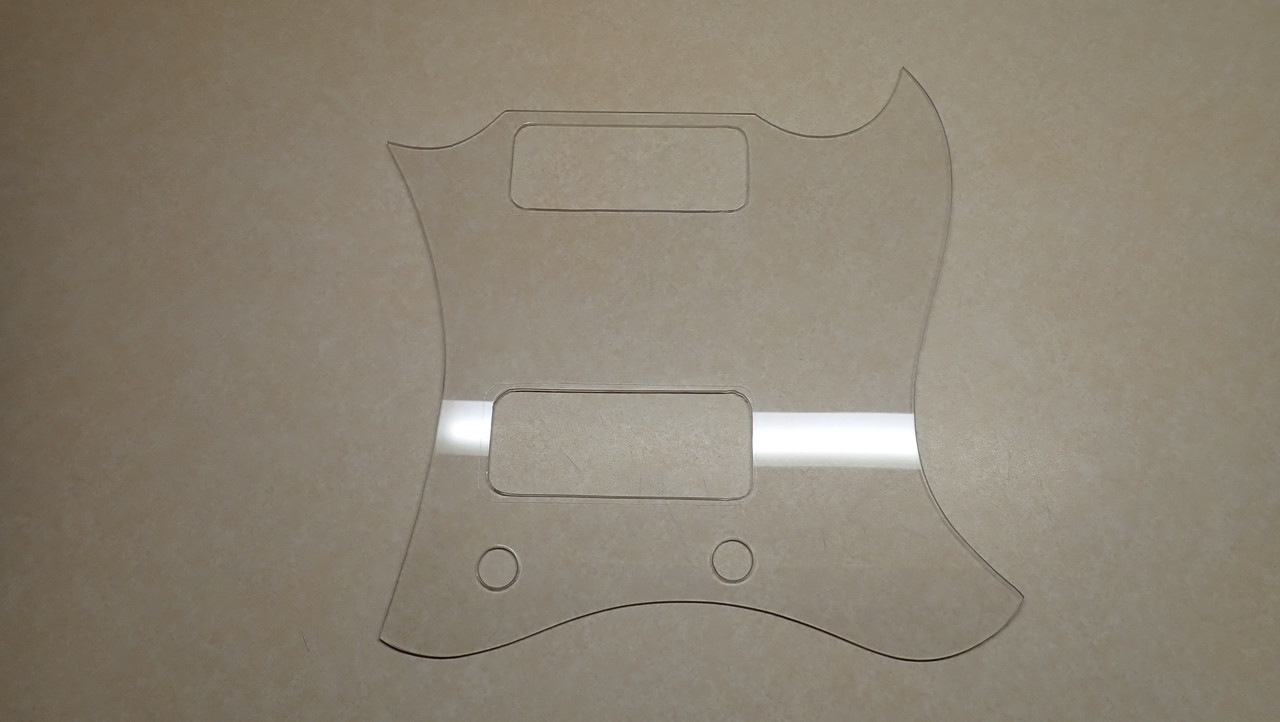
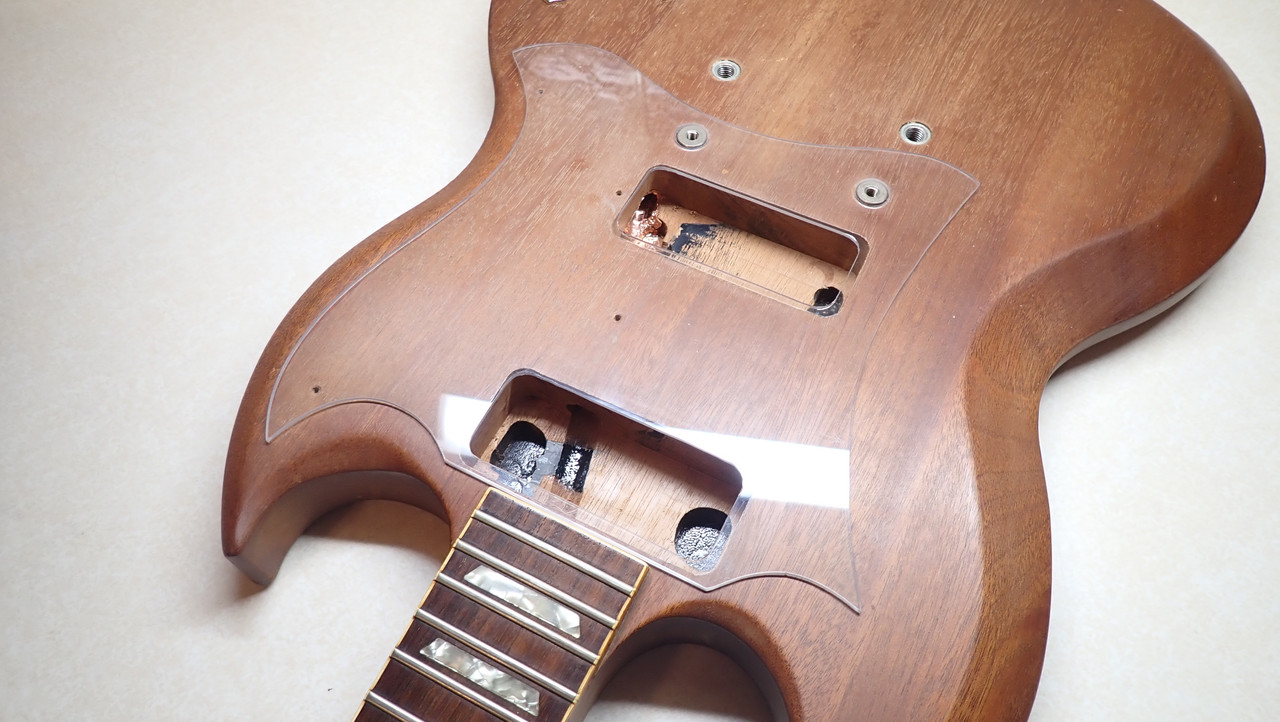
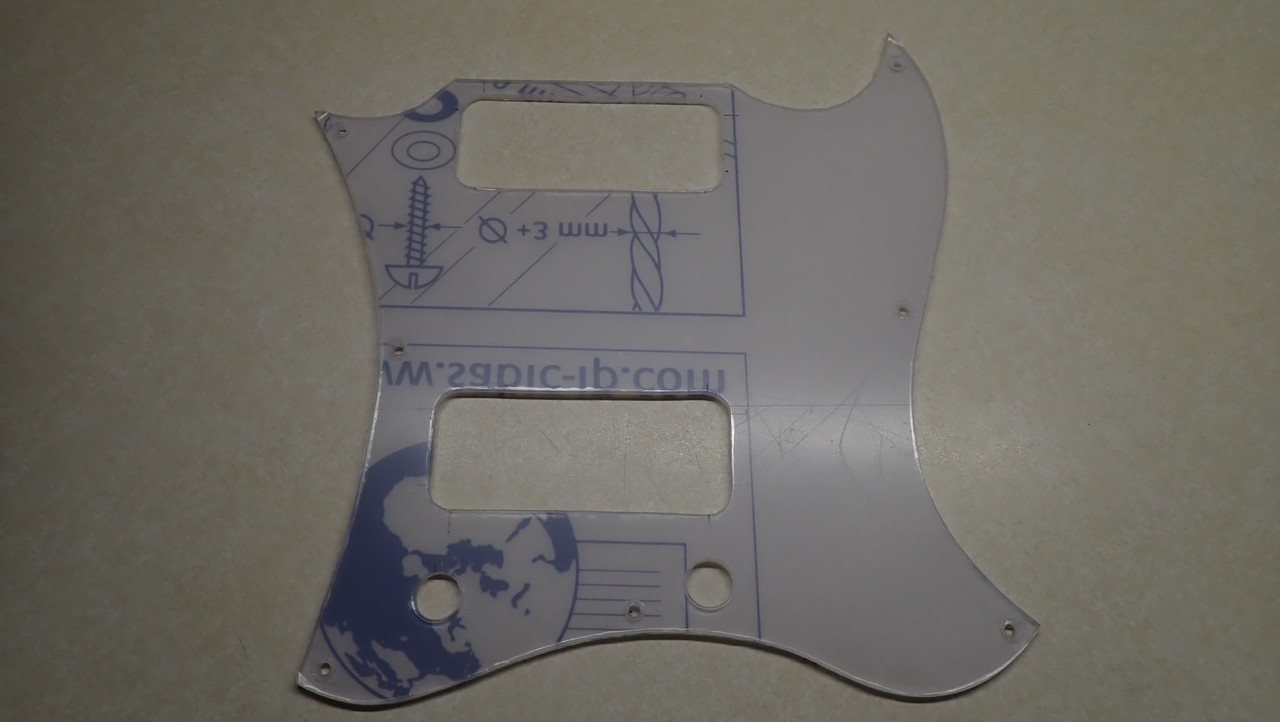
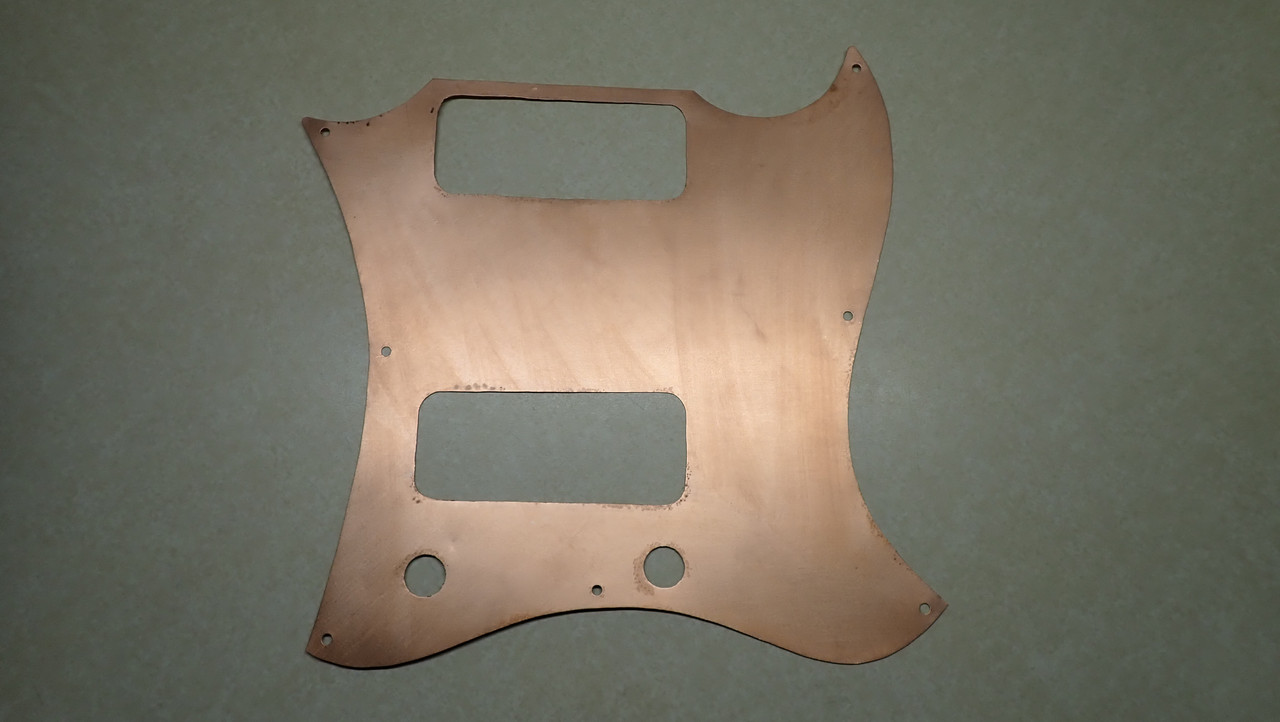
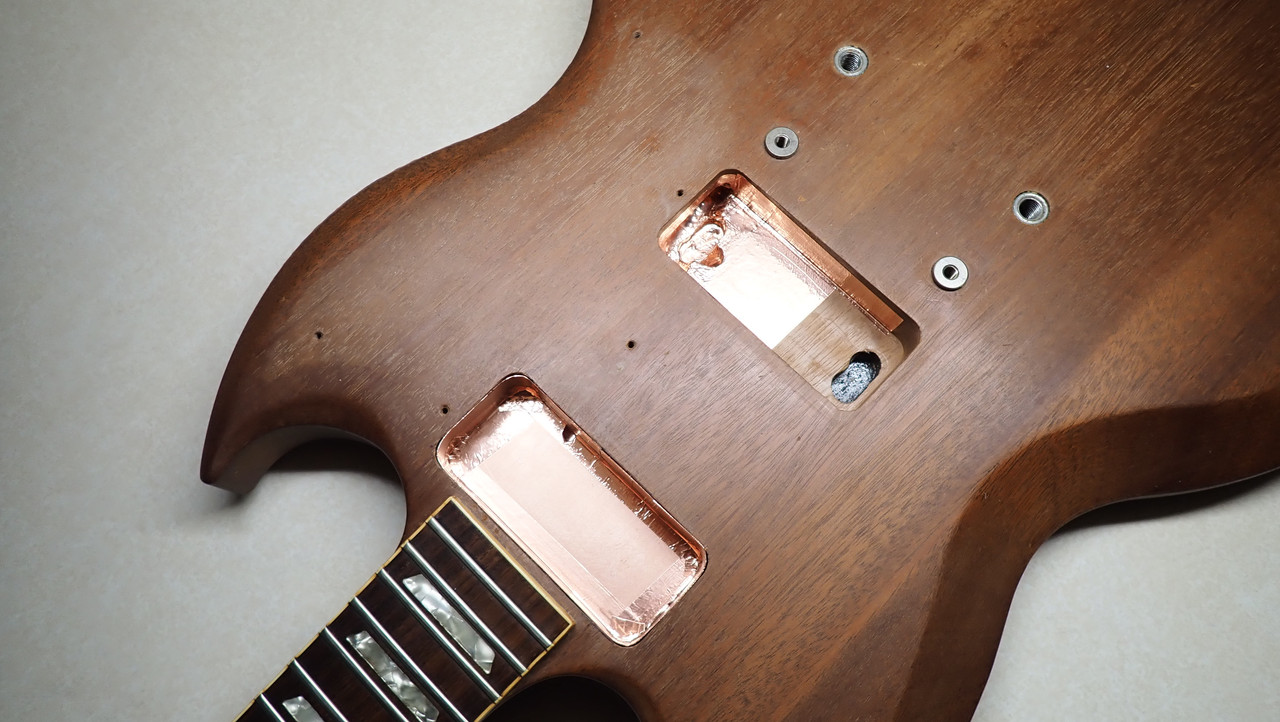
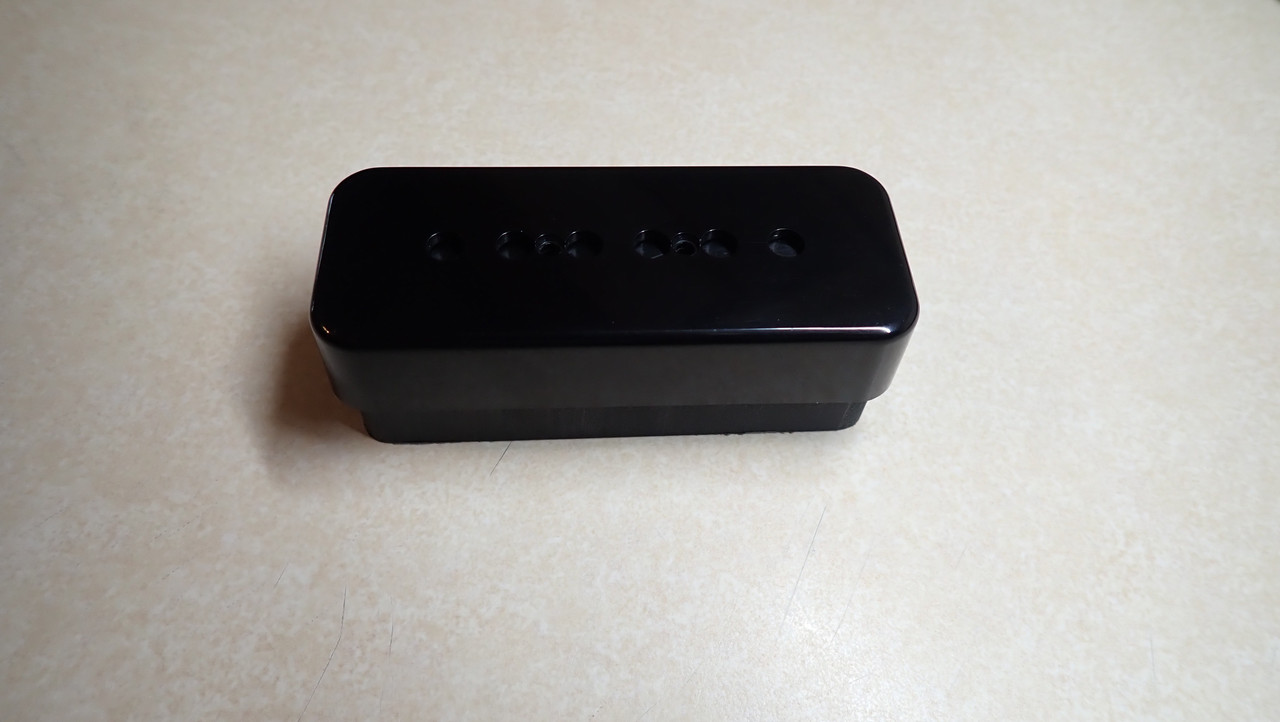
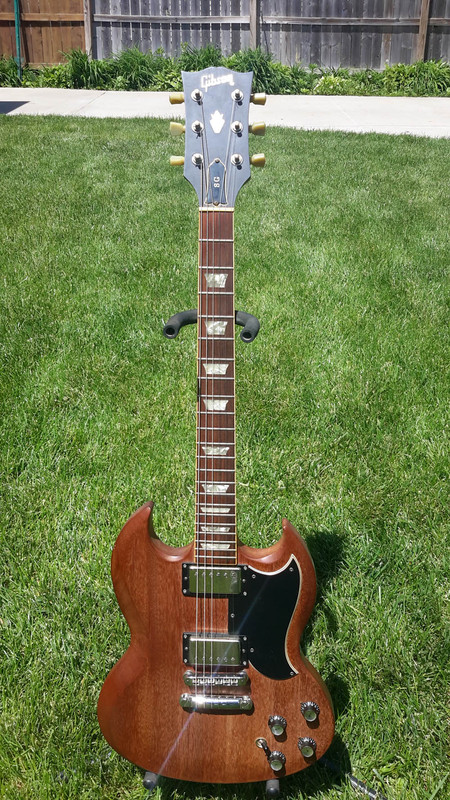
So lately I've been thinking more and more about what it would take to put P90s in this forsaken and nearly naked SG that I've had forever and have barely played. So I ordered a "batwing pickguard", new CTS 500k pots (audio taper), New Wolfetone P90s (Mean and Meaner), and supplies to "faraday cage" the control cavity and the pickup pockets. I've already started the project but haven't taken any pics yet. I'll try to document the project as best I can, but for now, here's a pic the SG before any work was done.

 
Last edited:

Speed King

Administrator
Staff member
Joined
Mar 27, 2018
Messages
2,130
Age
58
Location
Rockford, IL
#2
So here's the SG where it's at right now, gutted pickup and control cavities. Whenever I see a guitar with no pickups or controls it always reminds me of those creepy Amish dolls with no faces.


So above is the empty control cavity, instead of shielding with copper foil or God forbid, Aluminum foil, I'm opting use very thin sheet copper and solder everything together, and because 60/40 tin/lead solder is a poor blocker of EMI, I'll tape the backside of the soldered seems.


As luck would have it, the pickguard I was waiting on arrived today.


Here's the new pickgurad.


As you can see it's no where near properly fitting and most people would be cussing an making plans to send it back. But I knew going in it wouldn't fit. The mid 80's SGs were oddball platypus guitars, nothing like the vintage SGs from 68 on up to the mid 70's. I got the pickguard as a reference to make my own pickguard template, then my own custom pickguard. I plan to section it (cut it in half at the waist) and use the bottom and top halfs to "stretch it". I figure the pickup spacing is short about .875". I plan to also use the outer profile of the original pickguard to form the perimeter of the new pickguard.
 
Last edited:

Speed King

Administrator
Staff member
Joined
Mar 27, 2018
Messages
2,130
Age
58
Location
Rockford, IL
#3


So I have the bottom of the control cavity bucket made, it's a nice clean fit and looks good in the cavity.


The tab that's soldered to edge serves two purposes, first its a test of how easily the two planes of copper will solder together. I was able to make this joint with a Metcal solder station, and the help of a heat gun. The second purpose is to measure the depth for the side walls, I could've used a caliper but I already decided to make the test solder joint. The faint line you see about a quarter inch from the top of the tab is the exact height the side walls should be.


Above is the template I made to create the bottom plate of the control cavity bucket. It's out of Aluminum, I probably should've made it out of copper, then I could re-purpose it as the upper flange of the bucket, oh well.


Here are the 500Kohm pots and .022 micro farad orange drop caps, not being the trusting sort, I measured each one on a calibrated DMM (Fluke 87V). I like having the "useful" info on my pots, the exact, as measured resistance (out of circuit), the taper, and date of purchase on the back of the cap, don't worry, the stickers won't be soldered over, you'll see later how everything will be connected.
 

Speed King

Administrator
Staff member
Joined
Mar 27, 2018
Messages
2,130
Age
58
Location
Rockford, IL
#4


So I made a little more progress on the bucket today, I got the flange and the side walls done. I would've soldered the bottom plate on but I needed to mark and punch the holes for the pickup wires and output jack, both come in at an angle so the hole will actually be ellipses. I would've liked the solder joints to be tighter, but I underestimated how difficult this would be without a fixture to hold the pieces together during the soldering process. The good news is that soldering the bottom plate will go much smoother because the shape of the bucket is already there, I can use clamps to hold the two pieces in place.


So I mentioned I'd be cutting up the brand new pickguard, here it is in three sections. I won't be using that little piece at the top with the two holes, it's just there to show what I cut off. Try to ignore the reflections of the overhead light and the guys hands holding a camera.
 

Lynch

Well-known member
Joined
Mar 28, 2018
Messages
426
Location
Outland
#5
I wish that I had the time, tools and energy (and I supposed $) to fix up, refinish or restore old guitars. I think it would could be fun, but I'm also not sure that I would have the patience for it.

Good luck the rest of the way and keep sharing progress pix.
 

Lynch

Well-known member
Joined
Mar 28, 2018
Messages
426
Location
Outland
#6
Sidenote, I almost bought an SG in the mid 80's. My first guitar was some Yamaha POS that was less than memorable, but it was good enough to build my interesting in playing. I think that I had that guitar for maybe 6 months or so before I wanted to upgrade. Looked at a Les Paul as so many people did and hated it. The first time I tried to play one, I was turned off by just about everything about it (that never changed. I recognize their place in music history, but just couldn't stand the feel of them).

I checked out the other flashier guitars of the day but was drawn in most by the 3 following guitars:

GIbson Explorer
Gibson SG
Fender Strat

I went to mulitiple music shops and played these multiple times before finally settling on the Strat. Never really thought much about either of the Gibsons after that. Always liked the tone / sound from both of those Gibsons, but I got into more hard rock / metal during that phase of my life and the flashier guitars that I could make scream took most of my attention. Traded in the Strat for a strat-style BC Rich in 88 and I never looked back.
 
Last edited:

Speed King

Administrator
Staff member
Joined
Mar 27, 2018
Messages
2,130
Age
58
Location
Rockford, IL
#7
@ Lynch, we have similar taste in guitars! Never owned a B. C. Rich, I did lust after a Warlock for a time in my younger years

So here's the finished copper bucket, the seems will be taped with conductive adhesive copper foil tape (on the outside of the bucket where no one will see it). I plan to use that stuff as little as possible but I just can't get around not using it at all, unfortunately it's a necessary evil. The hole for the output jack it dead balls on, the hole for the pickup wires needs to be enlarged a little, but it's exactly where it needs to be as well, just a little small.

Here's another shot of the bucket. I think it looks pretty nice sitting in the control cavity, it's only been a couple days since I started making it but seems a lot longer.
 

Speed King

Administrator
Staff member
Joined
Mar 27, 2018
Messages
2,130
Age
58
Location
Rockford, IL
#8
I wish that I had the time, tools and energy (and I supposed $) to fix up, refinish or restore old guitars. I think it would could be fun, but I'm also not sure that I would have the patience for it.

Good luck the rest of the way and keep sharing progress pix.
Thanks Lynch!

The main cost is the pickups, everything else is pretty affordable. The copper was scrap I acquired, The pots and caps were under $30 if I remember correctly. The pickups I got at 25% off, Wolfetone is running a Corona virus sale on all the pickups including P90s. My set of P90s cost me $150. Have you heard of Wolfetone? I hadn't until I started researching P90s.
 

Lynch

Well-known member
Joined
Mar 28, 2018
Messages
426
Location
Outland
#9
Yep, I've heard of them. I remember watching some YT videos a few years back. I didn't watch everything out there, but do specifically remember them because of the name. Some good, gritty and dirty pickups, which I do have a fond appreciation for in terms of getting a good 70's classic rock tone.


Your bucket looks good! :cheers:
 

Speed King

Administrator
Staff member
Joined
Mar 27, 2018
Messages
2,130
Age
58
Location
Rockford, IL
#10
Thanks Lynch, I chose Wolfetone because so many of the people who recommended them, said they were great hard rock pickups. (They take gain well)
 
Last edited:

Speed King

Administrator
Staff member
Joined
Mar 27, 2018
Messages
2,130
Age
58
Location
Rockford, IL
#11
So here's today's update: The bucket is in permanent (I hope). The pots are in place as is the out put jack.


And I experienced my first set back today, the toggle switch threads won't reach through the guitar body, the threads are about .030 or so from the top of the guitar, I hope I can find a new toggle switch that will work, otherwise I'm hosed. :(
 
Last edited:

Speed King

Administrator
Staff member
Joined
Mar 27, 2018
Messages
2,130
Age
58
Location
Rockford, IL
#12
Ok boys and girls, this is a big day, the pickups arrived! Now I have to kick this project in gear because the pickups are no longer the pacing item. They arrived quickly (thanks Wolfe!), they were packaged well, they even smell good! (that new pickup smell) They look to be high quality all the way. I have a saying that goes "If something looks like it's high quality, it probably is, if something looks like it's low quality, it's probably is" I try to make everything as high quality as I can, and I greatly appreciate when others do as well.


So I've been working on the new pickgaurd, I have the batwing cut in half at the waist and have been fiting it to the guitar to try to come up with a template.


As you can see, not much material needs to be removed for the new pickups to fit, normally this might be done with a router, or maybe even hand tools like a hammer and chisel, but my brother has a milling machine in his basement so for the price of a brand new end mill (.500" 4 flute), I get the pockets milled by a pro. I plan to have him run a couple shallow passes across the bottoms of the pockets to make then nice an smooth. Since this was originally a bucker equipped guitar, the pickup pockets are too deep. I'll remedy that with a couple of hand machined aluminum plates, screwed down to the bottoms of each pocket.

So since I have access to calibrated measuring equipment, I thought I would measure the old pots that were originally in the guitar. The two volume pots read 212.6 Kohms and 240.4 Kohms, the two tone pots read 110.9 Kohms and 98.8 Kohms. (as always, I measured these values with a calibrated DMM) The caps were .047uf ceramic discs. Now I'd read that Gibson started using 300k pots starting sometime in the mid to late 70's, if these are 300k pots they're a tad out of spec. It's no wonder this guitar sounded like poo. I should've taken pics of the original cavity wiring to see if it was wired modern or 50's. The evidence I see suggests it was wired modern with linear taper pots. BTW, the new pickups will be wired 50's.
And while I was at it, I measured the humbuckers that were in it. The bridge measured 7.75 Kohms and the neck measured 7.91 Kohms, seems like I should had the two pickups swapped, oops!
 

Speed King

Administrator
Staff member
Joined
Mar 27, 2018
Messages
2,130
Age
58
Location
Rockford, IL
#13

The above pic shows the shielding of the inside of the pickup cover. Once the cover is on for good, I'll tape around the bottom plate and close the gap around the two. This should create a Faraday cage around the entire pickup, and the fact that the pickup wire braid is soldered to the bottom plate means I should get a connection to everything the braid is connected to including the pickup cavity bucket and the control cavity bucket, later on after the pickups are installed. I'm creating redundant connections throughout my network of individual Faraday cages.
 
Last edited:

Speed King

Administrator
Staff member
Joined
Mar 27, 2018
Messages
2,130
Age
58
Location
Rockford, IL
#14


And here's the pickup completely shielded. I'll probably apply copper foil over the pickup wires where they exit through the half moon notch in the bottom plate because it will bother me to no end if I don't.
 

Speed King

Administrator
Staff member
Joined
Mar 27, 2018
Messages
2,130
Age
58
Location
Rockford, IL
#15


The updates are few and far between this week, I'm on vacation and away from my tools and solder station. I did manage to find a switch that will work, but now I have to insulate the the area directly above the switch because the connections will be too close to the underside of the pickguard were the shield plate will be.


The pic shows how close the bottom of the switch (the end with the terminals, the baton with the plastic knob is the top) to control cavity cover plate shield.


Pretty sure I haven't posted this before, but here's the control cavity cover plate shield, I'll probably just apply some polyimide (Kapton) tape over where the bottom of the switch could come in contact with shield.
 

Speed King

Administrator
Staff member
Joined
Mar 27, 2018
Messages
2,130
Age
58
Location
Rockford, IL
#18
Another big day for project P90 SG, the pickup pockets have been milled out and they look nice, the operation was complete success. I have quite a few pics of the SG clamped down to the mill table, behold,...


Last edited:

Speed King

Administrator
Staff member
Joined
Mar 27, 2018
Messages
2,130
Age
58
Location
Rockford, IL
#19


So here's clearer shot of the milled out pickup pockets. If it looks like they aren't quite centered that's not an illusion, they were milled off center at the Gibson factory. I just enlarged the pocket that was there, now it's readily apparent that Gibson didn't center the pocket properly. No matter though, that's why I'm using the batwing pickguard, and speaking off,...


I have the template created, I made the executive decision to go with polycabonate (Lexan) for the template material. It makes the process of custom fabricating a pickguard template so much easier when you can see the curves and features of the guitar though the transparent material.


Here's the template on the guitar, you can see how far off the pockets are. (about .080") I used the new and old pickguards to make the template, I destroyed the new pickguard but didn't damage the original.
 

Speed King

Administrator
Staff member
Joined
Mar 27, 2018
Messages
2,130
Age
58
Location
Rockford, IL
#20


Made some progress this week, I have the new pickgaurd almost done, as you can see from the pic, it still has the protective coating that's on the poly carbonate when it's in sheet form. I won't be removing that until the pickups are installed and the pickup cavities are fully shielded.


Here's the shield for under the pickguard.


I've been working on the pickup cavities and have the neck pickup cavity complete. I also have both pickup wire tunnels shielded (that was a PITA).


I plan to do more today as it's Saturday, I plan to get the bridge pickup cavity shielded and get the pickups installed.


This is a pickup installation tool I made from a chunk of Delrin. What it will do is fit inside the pickup cover and allow me to transfer the pickup's mounting hole locations to the bottom of the pickup cavity. I will also keep the pickup centered in the pickguard while transferring the hole locations.


Here's a pic of it fitted inside the pickup cover.


This is a spacer that will be installed in the bottom of the bridge pickup cavity. Since humbucker guitars are routed deeper than P90 guitars, the bridge pickup cavity is too deep for the screws to reach so I'll be installing this Delrin block and mounting the pickup to it, instead of the wood of the guitar body.